Author: Jonathan Miller

  • The Perfect Humidity in Your Living Room

    The Perfect Humidity in Your Living Room

    It’s 30 – 50% RH. But there is more to the story.

    Hey there, home enthusiasts! Jonathan Miller here, your guide to crafting a living space that’s not just visually appealing, but truly enhances your well-being. Welcome to my little corner of the internet, where we explore inspiring and practical ways to elevate your home life. Today, we’re diving into something often overlooked but incredibly important: humidity. Specifically, finding the perfect humidity in your living room – because let’s face it, nobody wants a space that feels like a swamp or a desert!

    Get ready for an engaging and, dare I say, addictive read as we unlock the secrets to a balanced and comfortable living environment.

    Why Home Improvement Matters (More Than You Think!)

    We often think of home improvement as purely aesthetic – a new coat of paint, a trendy sofa, a strategically placed plant. While those things certainly contribute, a truly well-improved home goes deeper. It’s about creating a space that nurtures your emotional and physical well-being.

    Think about it: a comfortable living room, reflecting your personal style, provides a sanctuary after a long day. It’s a place to relax, recharge, and connect with loved ones. Taking control of your environment is empowering. Knowing you’ve curated a space that supports your needs is incredibly satisfying. A key part of this is addressing often-overlooked factors like living room humidity. A balanced indoor humidity significantly impacts your comfort, health, and even the lifespan of your furniture.

    water droplets on glass window

    Understanding Your Home’s Needs: The Humidity Edition

    Before you grab a paintbrush or rearrange the furniture, it’s essential to assess the current state of your home – especially its humidity levels. Here’s a step-by-step guide:

    1. Identify Areas That Need Improvement: This isn’t just about spotting a leaky faucet. It’s about recognizing discomfort related to living room humidity. Do you experience dry skin and static electricity in the winter? Or, perhaps your living room feels perpetually damp and musty in the summer? These are clues!
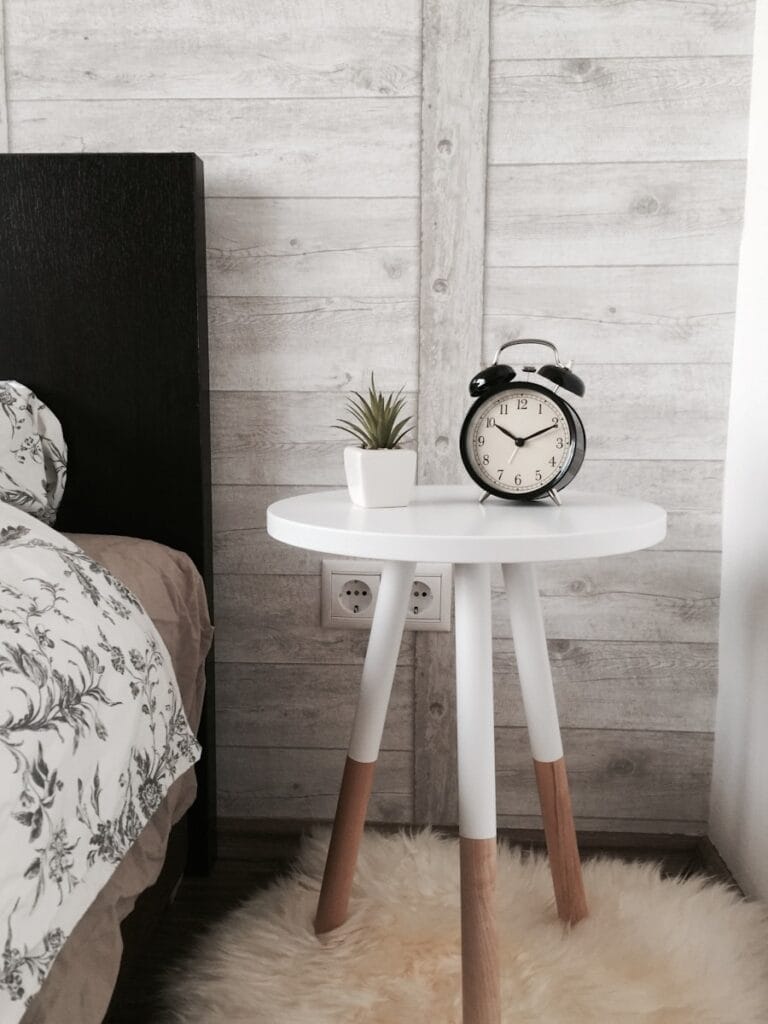
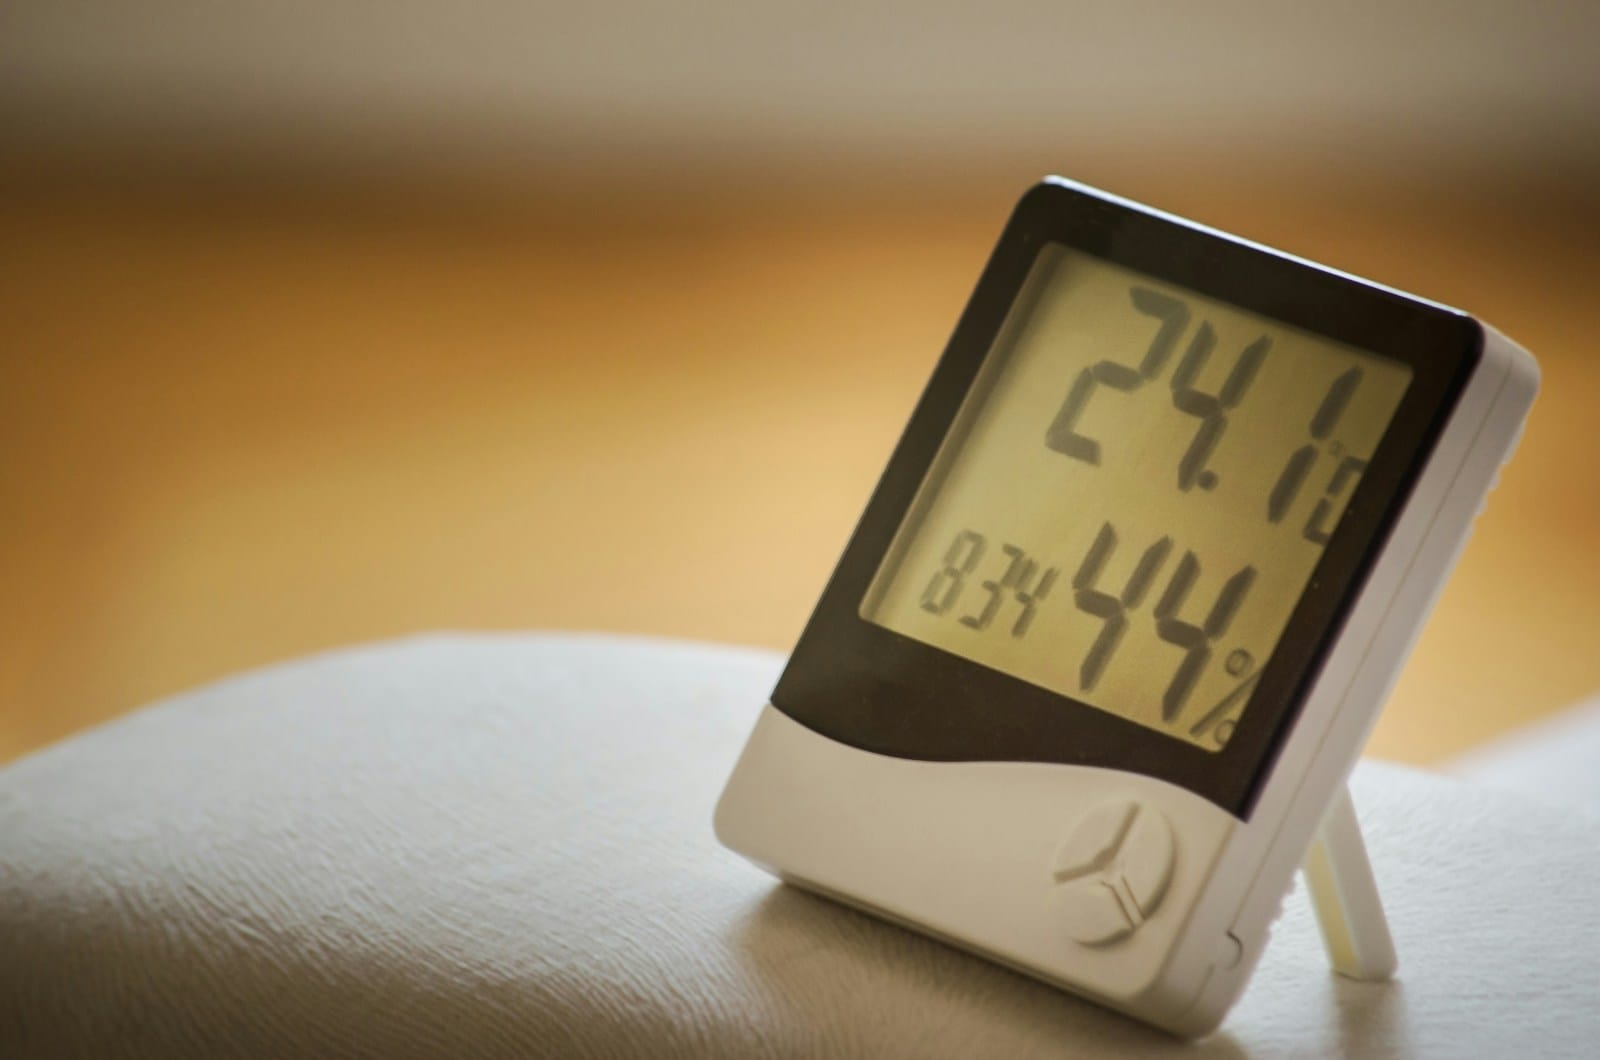
    2. Measure Your Living Room Humidity: This is crucial! Don’t rely on guesswork. Invest in a hygrometer for living room use. These inexpensive devices accurately measure the humidity levels living room, giving you a precise starting point. You can find them online or at most home improvement stores. Note the readings at different times of the day, especially during temperature extremes.
    3. Set Realistic and Clear Goals: Instead of aiming for “perfect,” aim for “optimal.” The ideal humidity for living room generally falls between 30% and 50%. However, personal comfort and specific climate conditions might influence your preferred range. Set a goal to maintain that range, making adjustments as needed throughout the year.
    4. Prioritize Projects for Maximum Impact: Addressing humidity problems living room can have a significant impact on your overall well-being. If you consistently experience low humidity in living room during winter, investing in a humidifier might be a higher priority than, say, repainting the walls. Similarly, if you’re battling high humidity in living room, a dehumidifier should be at the top of your list.
    white wooden framed glass window

    Budget-Friendly DIY Projects: Humidity Control Edition

    Controlling living room humidity doesn’t always require expensive professional installations. Here are some affordable DIY solutions you can tackle:

    • Addressing Low Humidity in Living Room:
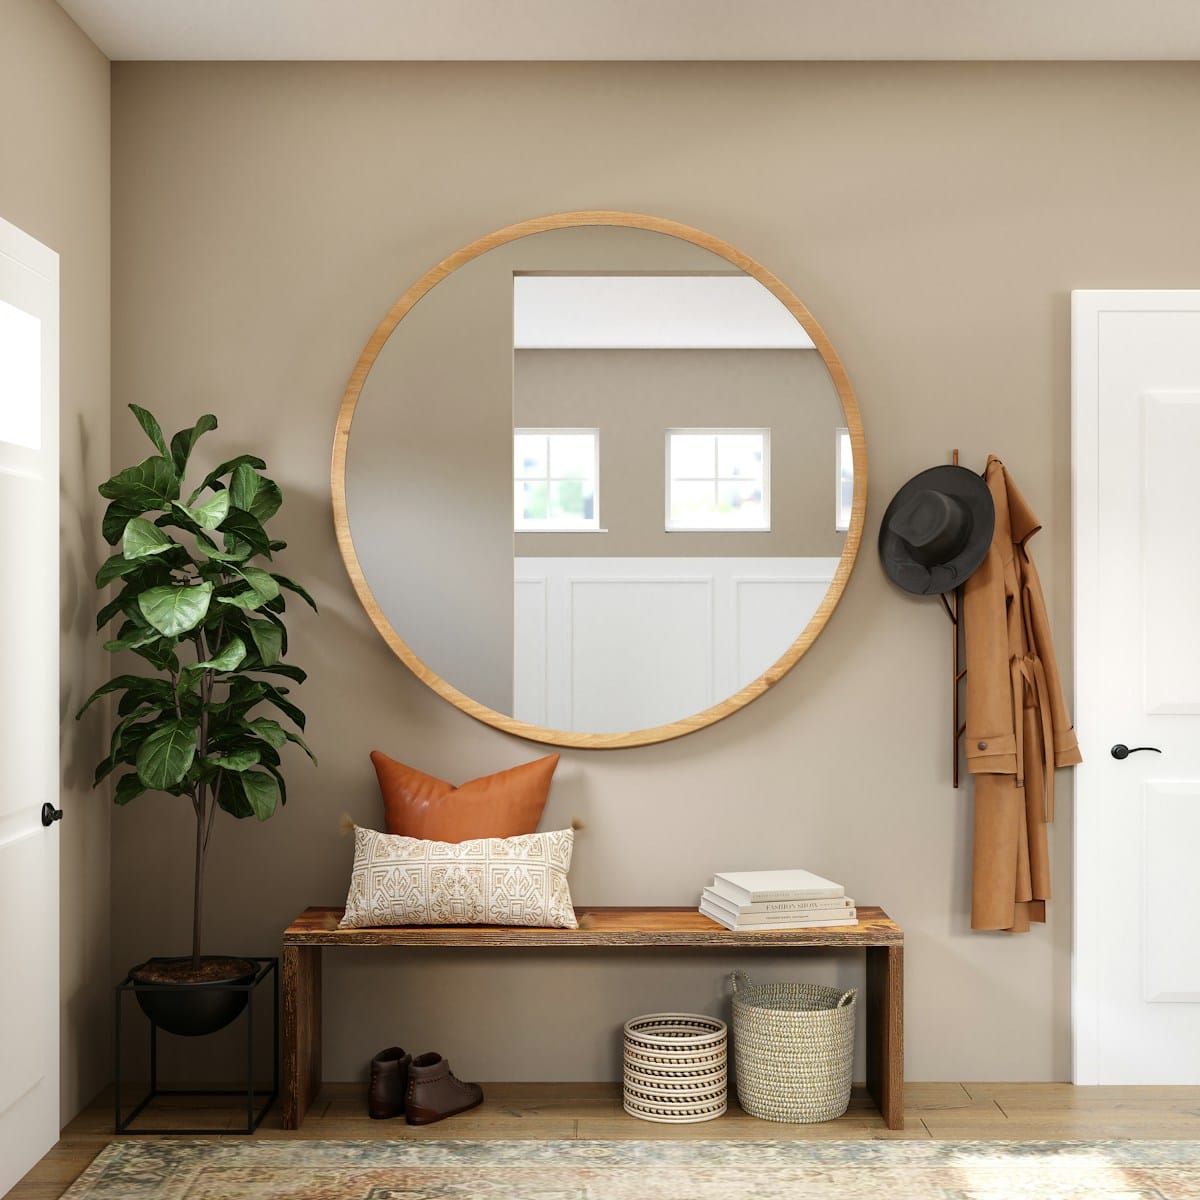
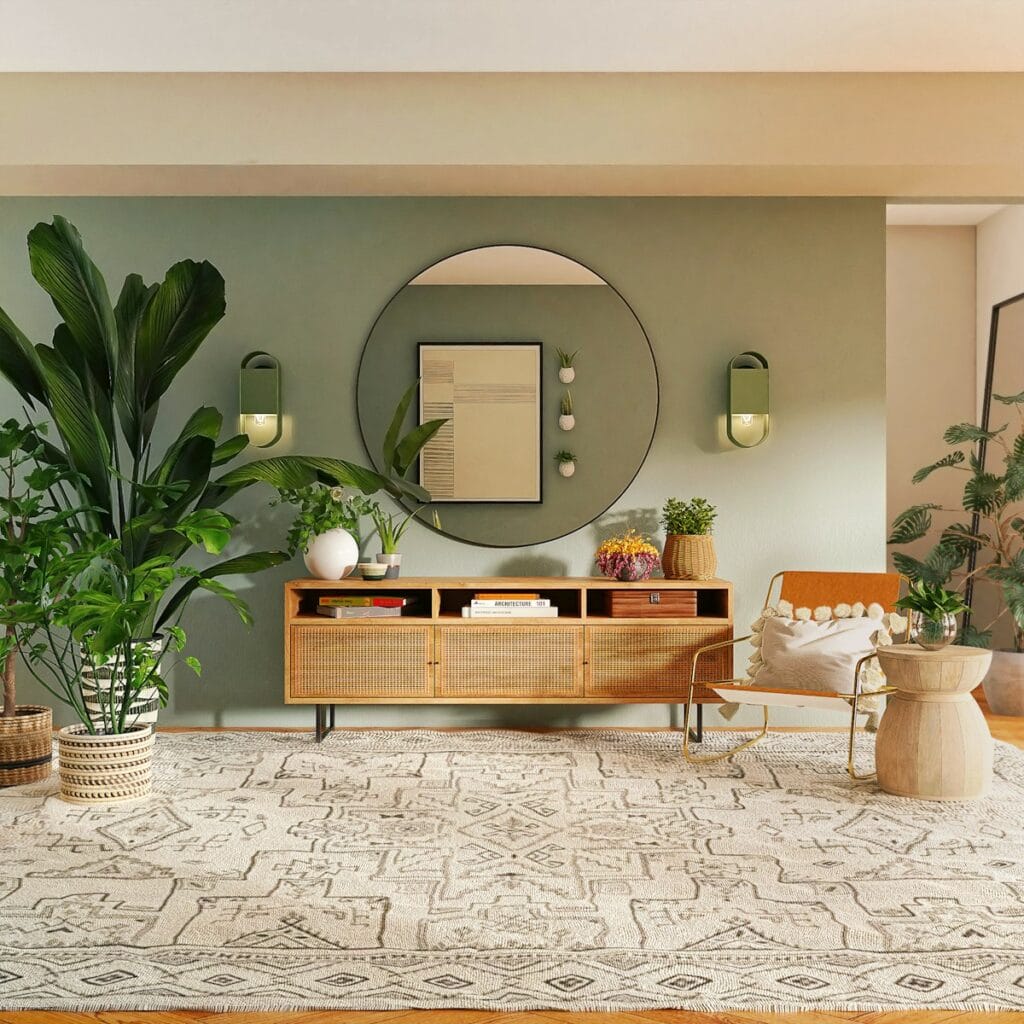
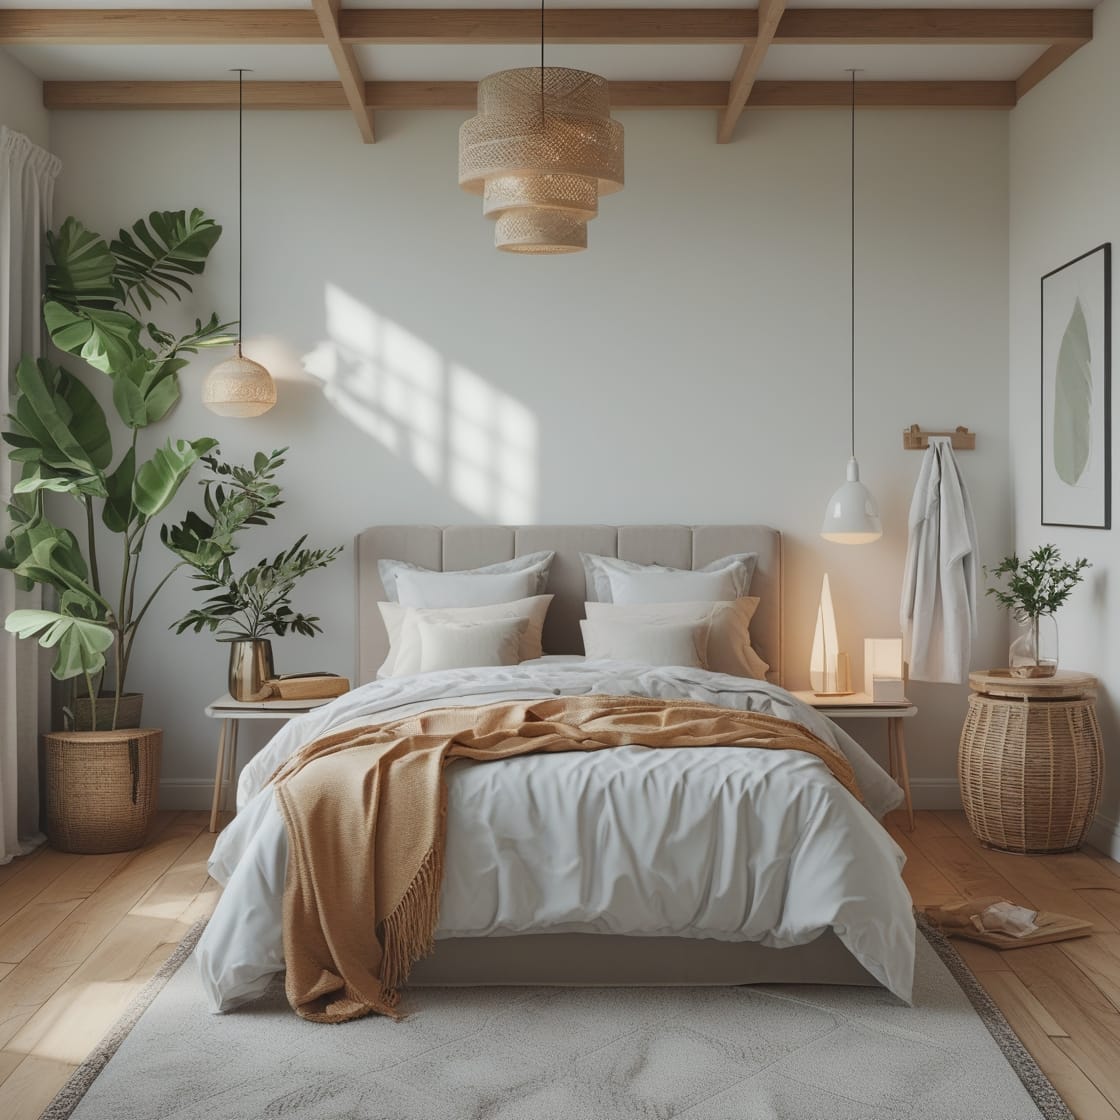
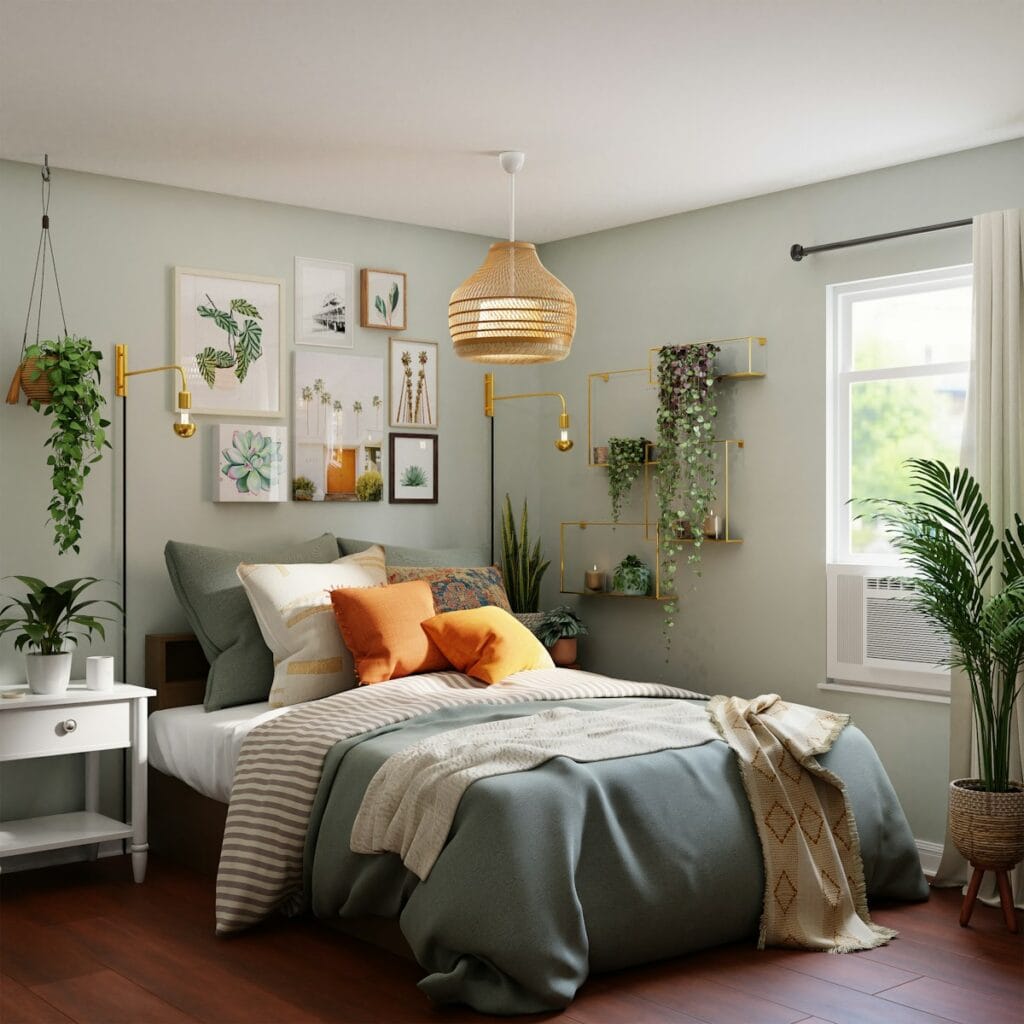
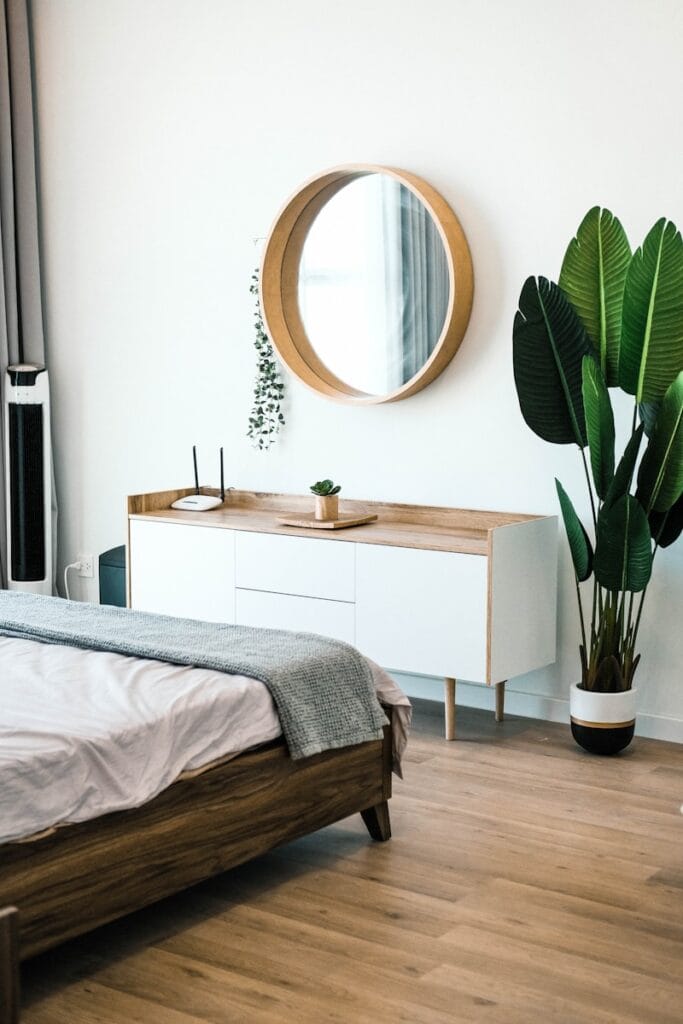
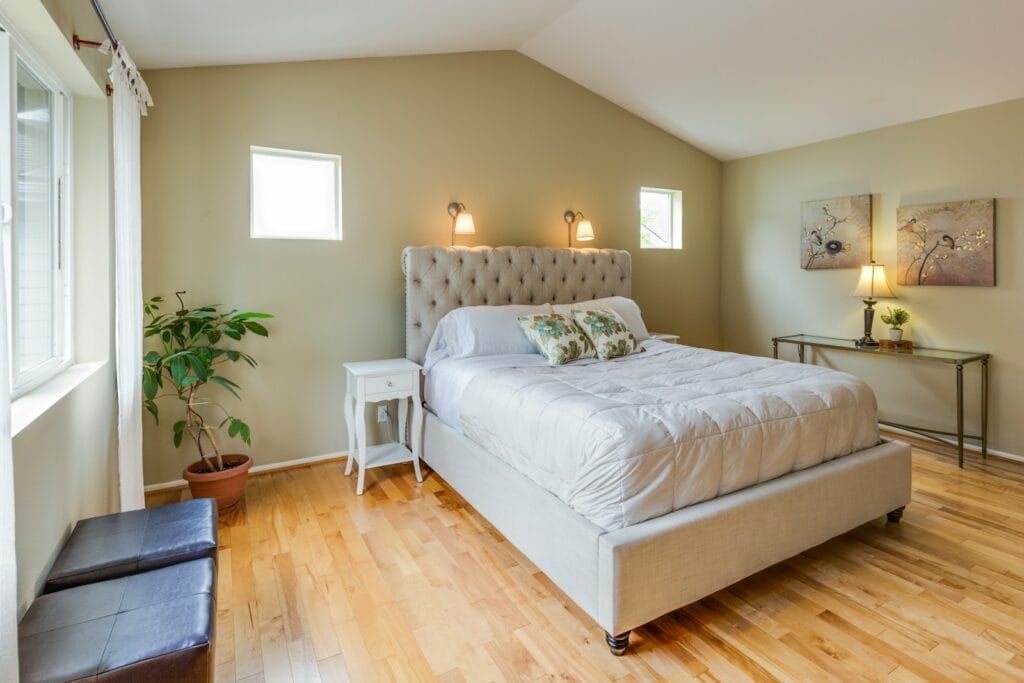
      • Strategic Plant Placement: Certain plants, like Boston ferns and spider plants, naturally increase humidity through transpiration. Grouping plants together amplifies this effect. Humidity and plants living room can be a beautiful and functional way to improve air quality.
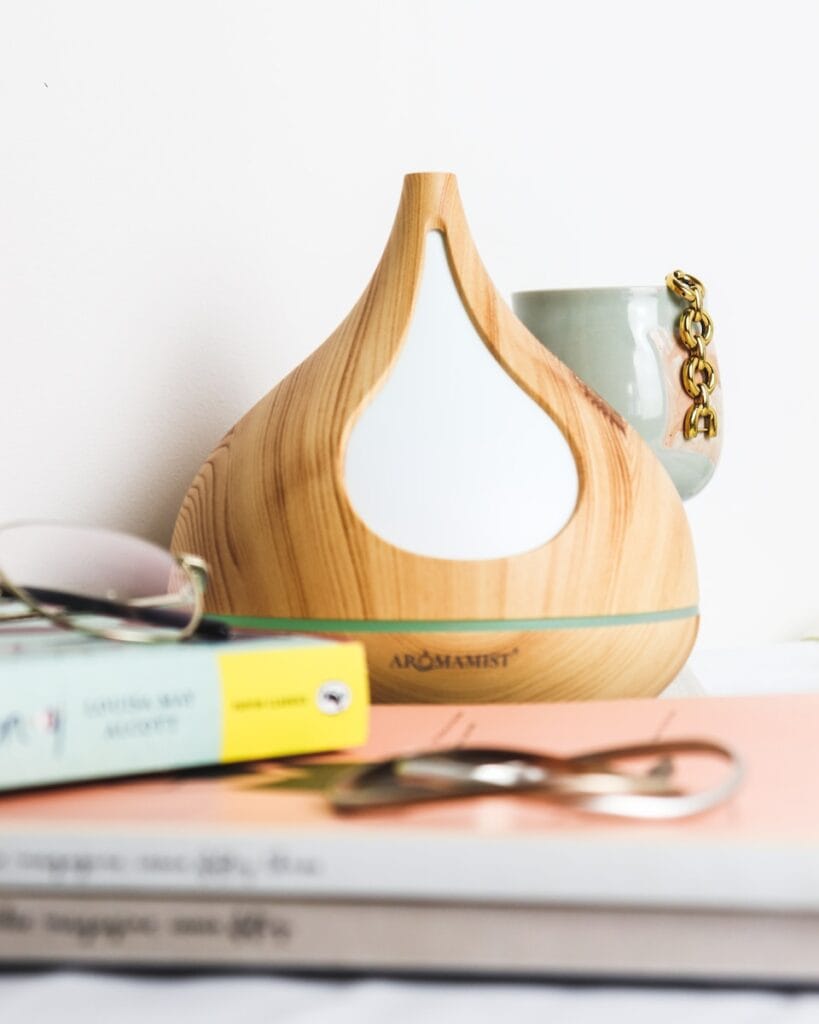
      • DIY Humidifier: Place a bowl of water near a heat source (radiator or sunny window). As the water evaporates, it adds moisture to the air.
      • Invest in a Humidifier for Living Room: While not strictly DIY, a small, personal humidifier can be very effective in a specific area. Look for energy-efficient models.
    • Combating High Humidity in Living Room:
      • Improve Ventilation: Open windows and doors regularly to encourage airflow. Use fans to circulate air, especially after showering or cooking.
      • Address Moisture Sources: Fix any leaks promptly. Ensure proper ventilation in bathrooms and kitchens to prevent moisture from spreading to the living room.
      • Consider a Dehumidifier for Living Room: A dehumidifier removes excess moisture from the air, preventing mold growth and improving air quality. Choose a size appropriate for your living room.
    gold and silver bracelet on white paper

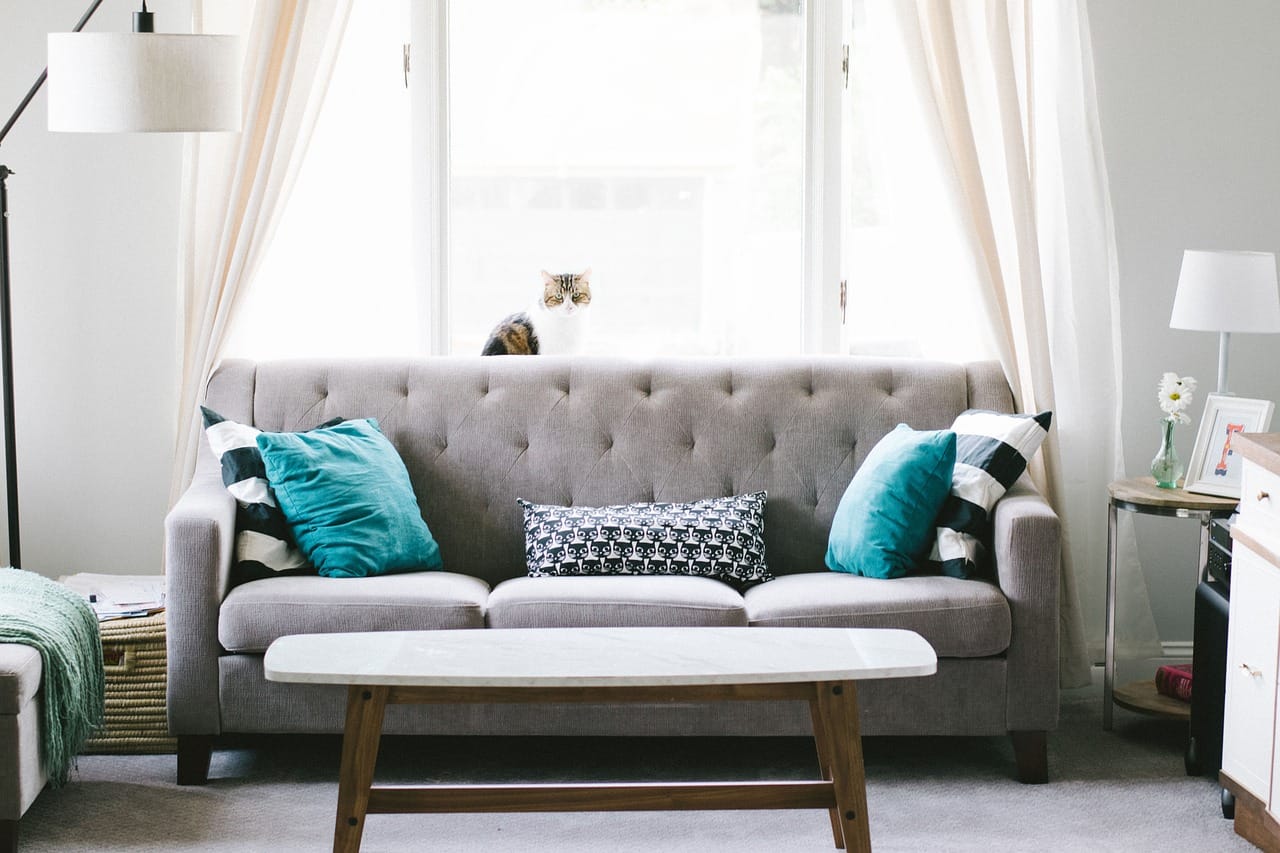
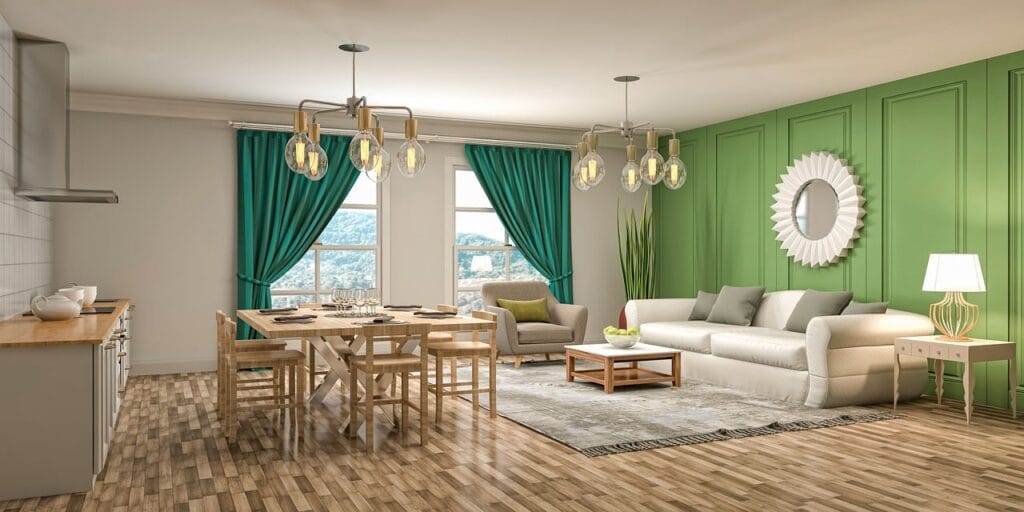
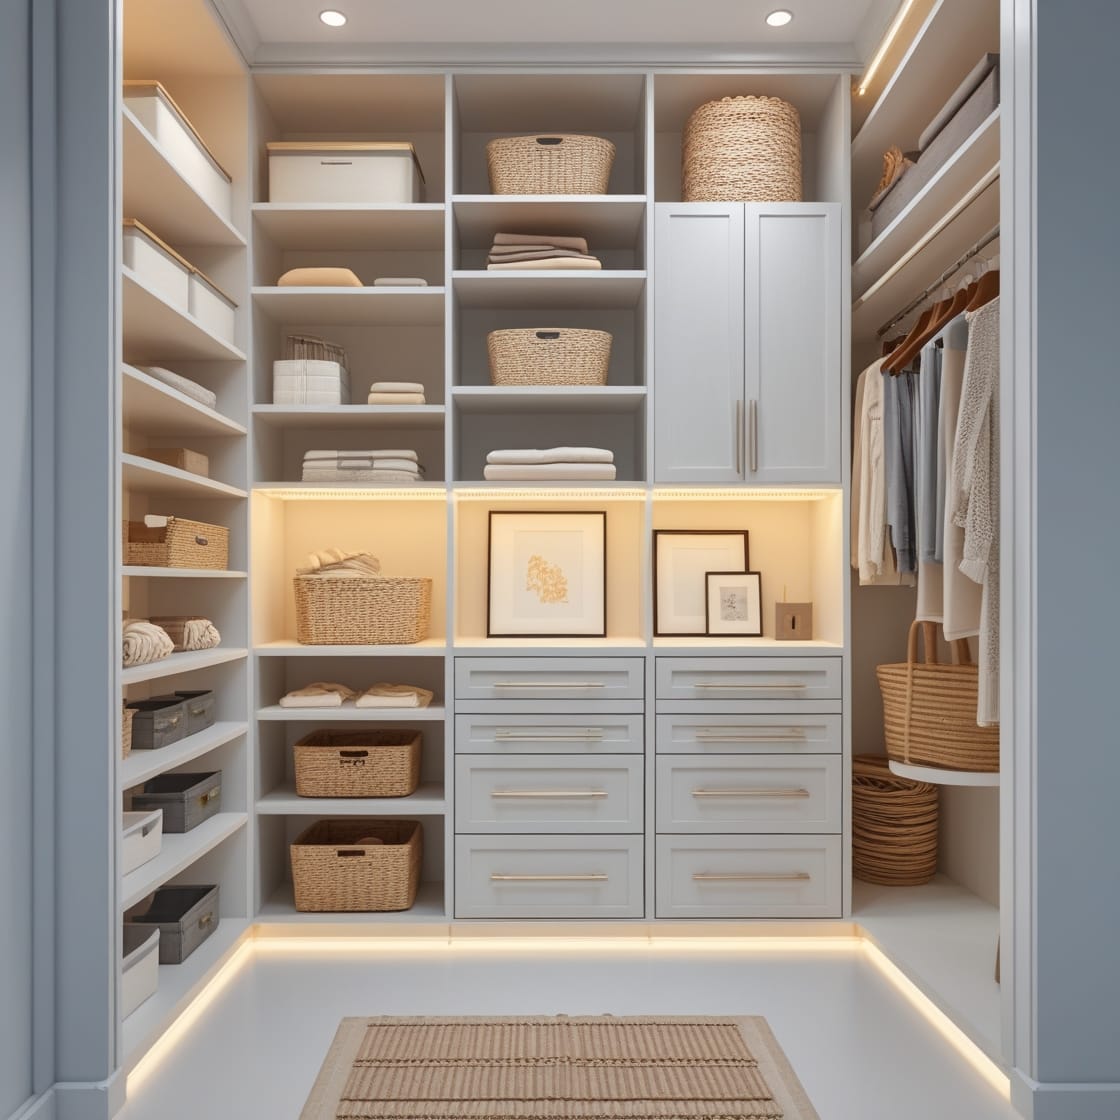
    Creating a Cozy, Inviting Space: Beyond Humidity

    Once you’ve addressed living room humidity control, you can focus on creating a truly cozy and inviting atmosphere:

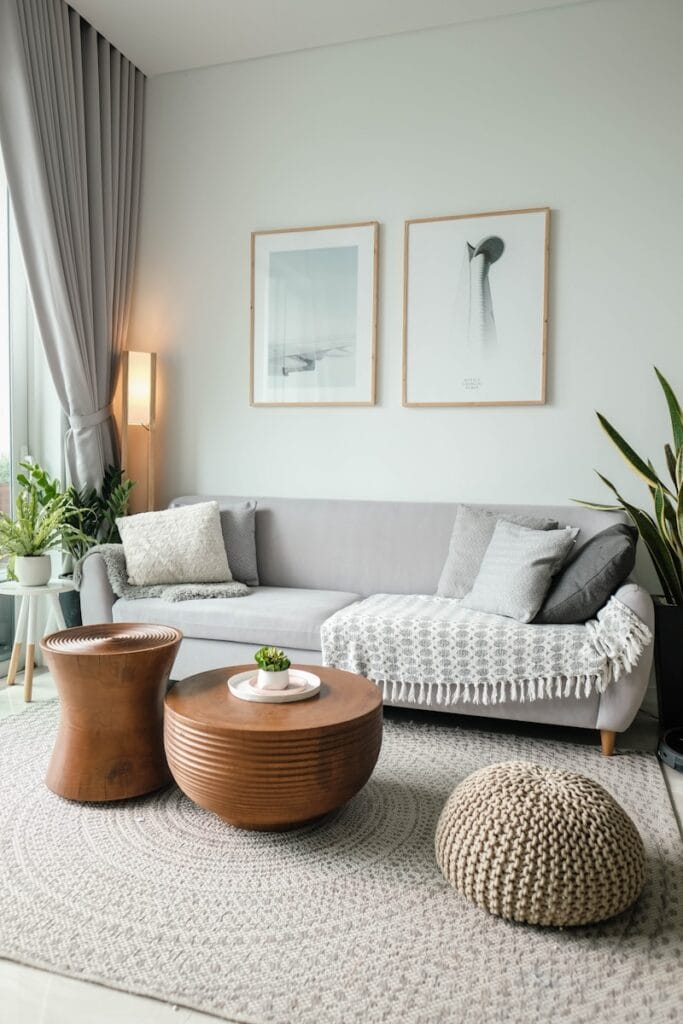
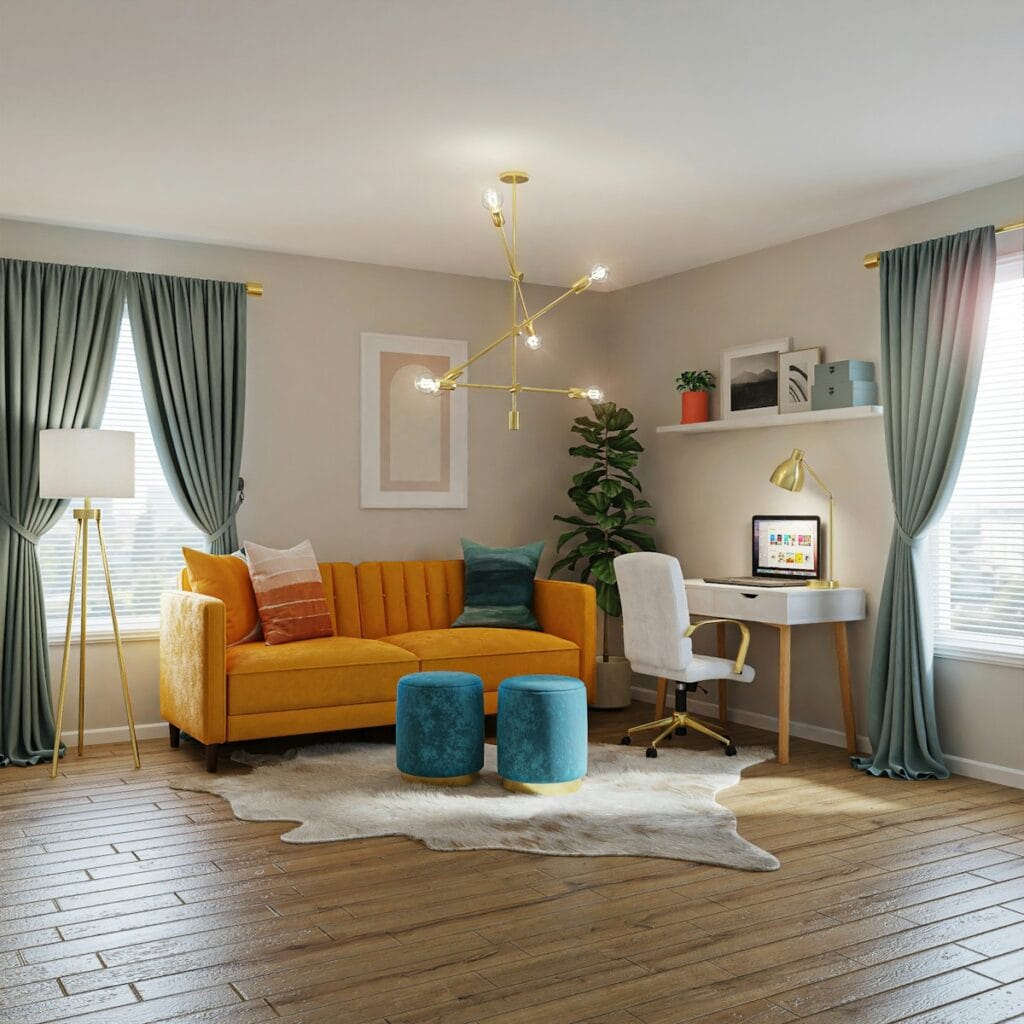
    • Color Palette: Warm, earthy tones tend to create a sense of comfort and relaxation. Consider using colors like soft greens, blues, and beiges.
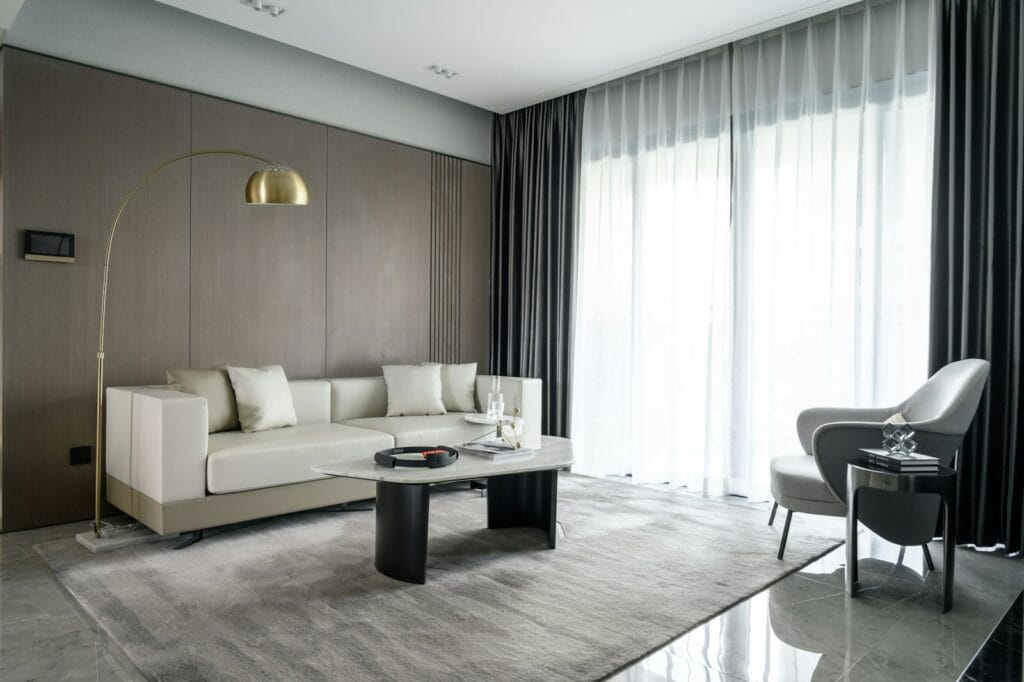
    • Lighting: Layer your lighting to create different moods. Use a combination of ambient lighting (overhead lights), task lighting (lamps for reading), and accent lighting (spotlights on artwork). Dimmable lights are a great way to control the ambiance.
    • Textures and Patterns: Mix and match different textures and patterns to add visual interest. Think plush throws, textured pillows, woven rugs, and patterned curtains.
    • Personalization: This is key! Add personal touches that reflect your interests and hobbies. Display your favorite books, artwork, photos, and travel souvenirs. These elements make your living room truly your own.
    a window with a view of a fern outside

    Expert Tips & Resources: Humidity and Beyond

    Here are some insights from interior design experts to help you on your home improvement journey:

    • Monitor Living room humidity Regularly: Don’t just set it and forget it. Regularly check your hygrometer and adjust your controlling humidity in home measures as needed.
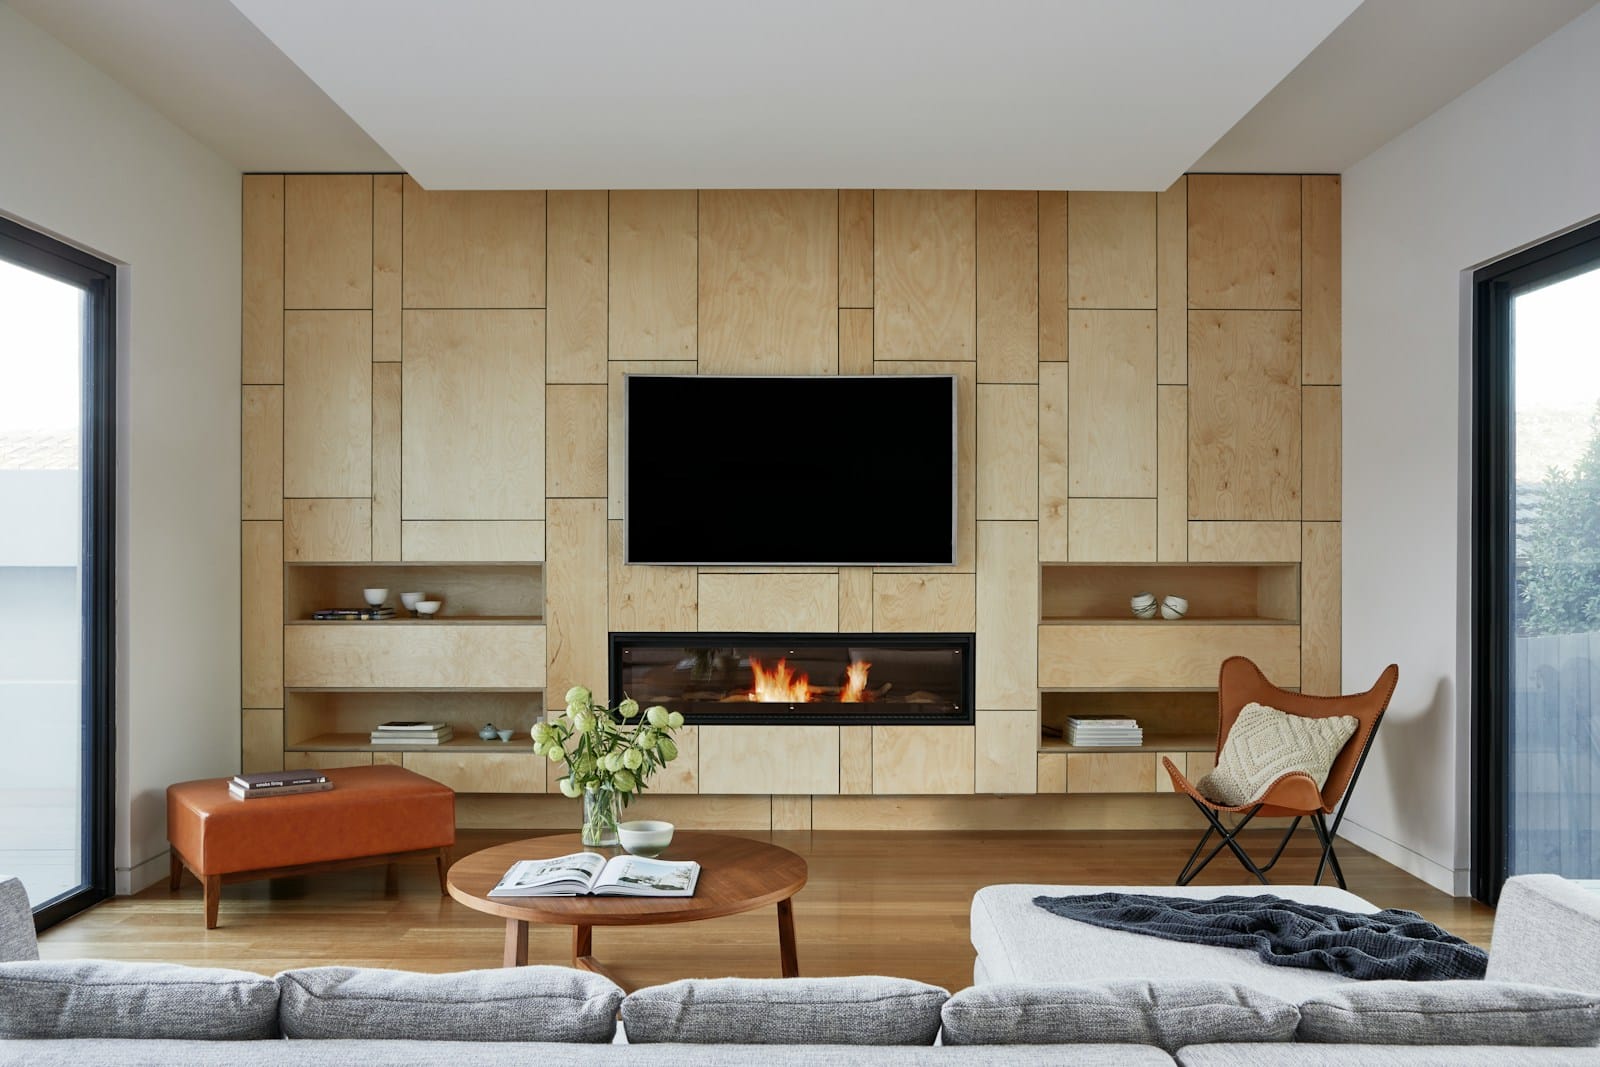
    • Consider the Humidity and Furniture Living Room Connection: High humidity can damage wood furniture, causing it to warp or rot. Low humidity can dry out wood, leading to cracks. Maintaining the optimal humidity living room can extend the life of your furniture.
    • Beware of Humidity and Health Living Room Issues: Both excessively high and low humidity can impact your health. High humidity can promote mold growth and exacerbate allergies and asthma. Low humidity can dry out your skin and respiratory system, making you more susceptible to infections. The recommended humidity living room is important for your health.

    Reliable Online Resources:

    • The EPA (Environmental Protection Agency): Provides valuable information on indoor humidity and air quality.
    • The American Lung Association: Offers insights into the health effects of dry air living room and too humid living room conditions.
    a doctor examining a woman's chest with a stethoscope

    Conclusion & Next Steps: Your Humidity-Controlled Haven Awaits!

    We’ve covered a lot today, from understanding the importance of living room humidity to implementing practical DIY solutions. Remember, creating a comfortable and healthy living space is an ongoing process. Start by assessing your current humidity levels living room and setting realistic goals. Don’t be afraid to experiment with different strategies and personalize your space to reflect your unique style.

    Your first step? Grab a hygrometer and start monitoring your living room humidity!

    Now, I’d love to hear from you! What are your biggest humidity problems living room? What DIY solutions have you found most effective? Share your experiences in the comments below! And don’t forget to subscribe to my blog for more inspiring and practical home improvement ideas. Let’s create beautiful and healthy homes, together!

    Until next time, happy improving!

  • Level Up Your Life: Turning Your Living Room into the Ultimate Gaming Paradise (and What to Expect in 2025!)

    Level Up Your Life: Turning Your Living Room into the Ultimate Gaming Paradise (and What to Expect in 2025!)

    Hey everyone, Jonathan Miller here! Welcome back to the blog, your source for smart, practical tips to simplify and elevate your everyday life. Today, we’re diving headfirst into a trend that’s not just for gamers, but for anyone looking to inject some serious fun and innovation into their home: transforming your living room into the ultimate home gaming stations. We’ll explore everything from cozy setups to futuristic visions of gaming living rooms in 2025, so buckle up!

    We all know that a well-designed living space can dramatically impact our mood and overall well-being. It’s where we unwind after a long day, connect with loved ones, and express our personal style. But what if we could take it a step further, blending comfort and style with the immersive world of gaming? This isn’t just about shoving a console under your TV; it’s about creating a dedicated space that enhances your gaming experience and seamlessly integrates with your modern lifestyle. Get ready for an addictive read because we’re about to unlock the secrets to crafting the perfect gaming setup living room!

    Why Home Improvement Matters (Especially When Gaming is Involved!)

    Let’s face it: a cluttered, disorganized, or poorly designed space can be a serious drag on your mental state. On the other hand, a thoughtfully curated living room—one that reflects your personality and caters to your needs—can significantly boost your mood, reduce stress, and even increase productivity.

    Adding a gaming element to this equation only amplifies these benefits. Think about it:

    • Increased Comfort and Well-being: A dedicated gaming console living room means a designated space for relaxation and entertainment. Comfortable seating, optimized lighting, and strategically placed accessories can create a truly immersive and enjoyable experience.
    • A Space That Reflects Personal Style and Creativity: Your living room gaming design should be an extension of your personality. Embrace your favorite colors, characters, and themes to create a unique space that screams “you.”
    • The Empowerment of Control: Taking charge of your living space, especially when incorporating a hobby you love, gives you a sense of control and accomplishment. Building your own ultimate gaming living room is a rewarding journey that leaves you with a space you’re truly proud of.
    gaming setup: black flat screen tv turned on near white wall

    Understanding Your Home’s Needs: A Gamer’s Perspective

    Before you start tearing down walls and ordering neon lights, it’s essential to assess your current living room situation. This isn’t just about where to put the PlayStation; it’s about understanding your space’s limitations and potential.

    Here’s a step-by-step guide:

    1. Identify Areas for Improvement: What’s currently working in your living room, and what’s not? Is the lighting too harsh? Is the seating uncomfortable for long gaming sessions? Is the layout conducive to multiple players?
    2. Set Realistic and Clear Goals: Do you want a subtle gaming living room decor that blends seamlessly with your existing style? Or are you aiming for a full-blown immersive gaming living room experience with dedicated screens and custom lighting? Define your vision.
    3. Prioritize Projects for Maximum Impact and Efficiency: Tackle the most impactful changes first. Maybe that’s upgrading your TV, investing in a comfortable gaming chair, or improving your Wi-Fi signal.

    Think about things like cable management (a must for any modern gaming living room), soundproofing (if you’re prone to late-night gaming sessions), and ventilation (to keep your equipment from overheating).

    woman in black and white floral shirt standing in front of black and white wall

    Budget-Friendly DIY Projects: Level Up Without Breaking the Bank

    Transforming your living room into a gaming haven doesn’t have to cost a fortune. Here are some creative, affordable DIY projects you can tackle on a weekend:

    • Repainting for Immersion: A fresh coat of paint can dramatically change the atmosphere of a room. Consider darker shades for a more immersive gaming experience or brighter colors for a more energetic vibe.
    • Upcycling Furniture for Gaming: An old coffee table can be transformed into a dedicated living room entertainment center with some sanding, staining, and a few well-placed shelves. Look for second-hand furniture that can be repurposed for gaming storage or display.
    • Adding Accent Pieces for Personalization: Posters, figurines, and custom artwork can add a personal touch to your gaming space. Look for affordable options online or create your own DIY decorations.

    These projects aren’t just about aesthetics; they also add functional value. A well-organized gaming setup living room not only looks great but also makes gaming more convenient and enjoyable.

    person holding black game controller

    Creating a Cozy, Inviting Space: Comfort is Key

    A great gaming setup isn’t just about cutting-edge technology; it’s also about creating a comfortable and inviting atmosphere.

    • Choosing the Right Color Palette: Consider colors that promote relaxation and focus, such as blues, greens, and grays. You can also add pops of color with accent pieces to reflect your personality. For a cozy gaming living room, warm tones like browns and oranges can create a welcoming atmosphere.
    • Mixing Textures and Patterns: Incorporate different textures, such as plush rugs, soft throws, and textured wall coverings, to add depth and visual interest to your space.
    • Personalization is Paramount: The most important element of any gaming space is its personalization. Add elements that reflect your unique interests and passions. This could include displaying your favorite games, showcasing your collection of figurines, or incorporating custom artwork.
    man in red shirt watching tv

    Expert Tips & Resources: Level Up Your Knowledge

    To truly master the art of gaming in the living room, it’s helpful to consult with experts and tap into valuable resources.

    • Interior Design Insights: Consider consulting with an interior designer who specializes in creating functional and stylish gaming spaces. They can offer valuable insights on layout, lighting, and acoustics.
    • Online Resources and Tools: Websites like Pinterest, Houzz, and Reddit are treasure troves of inspiration for gaming room designs. You can also find helpful tutorials and product reviews online.
    • Avoiding Common Pitfalls: Be sure to plan your space carefully before making any purchases. Avoid cluttering your gaming area with unnecessary items. And don’t forget about cable management!
    black flat screen computer monitor turned on beside black computer keyboard

    The Future is Now: Gaming Living Room 2025 and Beyond

    Looking ahead to 2025 gaming trends, we can expect even more integration of technology and design in the next-gen gaming living room. Imagine:

    • Smart Living Room Gaming: Voice-controlled lighting and temperature, personalized sound profiles, and automated entertainment systems.
    • Augmented Reality (AR) Integration: Gaming experiences that seamlessly blend with the real world, turning your living room into a virtual battlefield.
    • Holographic Gaming: Projecting 3D images of characters and environments directly into your living room.

    The possibilities are endless! The key is to embrace innovation and create a gaming living room 2025 that is both functional and futuristic. The question will be if you have designed a best gaming setup living room.

    gray round portable speaker on white table

    Conclusion & Next Steps: Time to Play!

    So, there you have it! A comprehensive guide to transforming your living room into the ultimate gaming living room. Whether you’re a casual gamer or a hardcore enthusiast, these tips and ideas will help you create a space that is both functional and fun. The living room gaming trend is only going to grow in popularity!

    Remember, the key is to personalize your space and make it your own. Don’t be afraid to experiment with different layouts, colors, and accessories until you find the perfect combination.

    Now it’s your turn! Take the first step towards your dream gaming space today. Start by assessing your current living room, setting realistic goals, and gathering inspiration. And don’t forget to share your progress and experiences with me in the comments below. I can’t wait to see what you create!

    And while you’re at it, subscribe to the blog for more inspiring content on home improvement, modern living, and everything in between. Let’s level up our lives together!

  • How Can I Make My Living Room Feel Bigger?

    How Can I Make My Living Room Feel Bigger?

    Hey everyone, Jonathan here! Welcome back to the blog – your haven for inspiring home improvement ideas and practical tips to simplify modern living. Today, we’re tackling a common challenge: How Can I Make My Living Room Feel Bigger? Making your living room feel bigger and more inviting, even if it’s not exactly sprawling.

    We’ve all been there, right? Staring at our living room, wishing it felt a little less cramped and a little more…expansive. Whether you’re dealing with a small apartment living room or simply want to maximize living room space in your current home, I’m here to tell you it’s entirely possible to create the illusion of a larger, more comfortable space. Get ready for an engaging, addictive read filled with actionable living room design tips!

    Why Home Improvement Matters: More Than Just Aesthetics

    Before we dive into the specifics, let’s talk about why sprucing up your living room is so important. It’s not just about having a pretty space (though that’s a definite bonus!). It’s about nurturing your well-being.

    • Increased Comfort and Well-being: A well-designed, clutter-free living room promotes relaxation and reduces stress. It’s a space where you can truly unwind and recharge after a long day.
    • A Space That Reflects Your Personal Style: Your living room should be a reflection of you. It’s an opportunity to showcase your personality, your tastes, and your unique style.
    • Empowerment Through Environment: Taking control of your environment, even in small ways, can be incredibly empowering. It’s a way to feel more grounded and in charge of your life.

    So, let’s get started on transforming your living room into a space you truly love!

    green living room that dont make you think: How Can I Make My Living Room Feel Bigger?

    Understanding Your Living Room’s Needs: Time for a Critical Eye

    First, let’s assess what we’re working with. Grab a notepad (or your favorite note-taking app) and answer these questions honestly:

    1. What are the dimensions of my living room? Knowing the exact square footage is key.
    2. What’s the biggest challenge? Is it clutter? Furniture arrangement? Lack of natural light?
    3. What are my must-have items? What absolutely needs to stay in the living room?
    4. What’s my budget? We’re all about budget-friendly solutions here!
    5. What’s my timeline? Are we talking a weekend refresh or a longer-term project?

    Once you have a clear picture of your living room’s challenges and your goals, you can prioritize your living room layout ideas and start planning your attack!

    brown pencil on white printing paper

    Budget-Friendly DIY Projects to Expand Your Horizons (and Your Living Room!)

    You don’t need to break the bank to create a more spacious-feeling living room. Here are a few affordable DIY projects to get you started:

    • Declutter, Declutter, Declutter! (Free!) This is the single most impactful thing you can do to open up living room. Get rid of anything you don’t need, use, or love. Be ruthless! Donate, sell, or toss items that are holding you back.
    • Repaint with Light Colors: A fresh coat of paint is a game-changer. Opt for light, neutral colors like white, cream, light gray, or pale blue. These colors reflect light, making the room feel brighter and larger. Think about a cool living room color scheme
    • Upcycle Furniture: Give old furniture a new lease on life with paint, new hardware, or fresh fabric. This is a great way to save money and create unique pieces that fit your style.
    • Add Mirrors: Strategically placed living room mirrors are magical. They reflect light and create the illusion of more space. Try placing a large mirror on a wall opposite a window to maximize the effect. Read more here.
    • Create Vertical Storage: Think shelves, tall bookshelves, and wall-mounted cabinets. This maximizes storage without taking up precious floor space.
    living room, interior design, 3d rendered, 3d rendering, decor, decoration, furniture, apartment, home, house, stylish, contemporary, room, living room, living room, living room, living room, living room, interior design

    Creating a Cozy, Inviting (and Spacious-Feeling!) Space

    Now, let’s focus on creating a warm and inviting atmosphere that feels surprisingly spacious.

    • Color Palette: As mentioned before, light and neutral colors are your best friend. However, don’t be afraid to add pops of color with accessories like pillows, throws, and artwork. A brighten living room can change the feel entirely!
    • Lighting: Good lighting is crucial. Maximize natural light by keeping windows clean and uncovered. Supplement with lamps, overhead lighting, and even fairy lights to create a warm and inviting glow.
    • Furniture Arrangement: This is where many people struggle. Here are some living room furniture arrangement tips to consider:
      • Float your furniture: Don’t push everything against the walls. Floating your furniture creates a more open and inviting feel.
      • Use smaller-scale furniture: Opt for furniture that’s proportional to the size of your living room. Avoid bulky, oversized pieces.
      • Create focal points: Arrange your furniture around a focal point, such as a fireplace, a large window, or a piece of artwork.
      • Leave space for traffic flow: Ensure there’s enough space for people to move around comfortably.
    • Decor and Accessories: Less is more! Avoid cluttering your living room with too many accessories. Choose a few key pieces that you love and that reflect your style. Think about living room decorating tips
      • Rugs: Use a rug to define the seating area and add warmth and texture. Make sure the rug is large enough to anchor all the furniture.
      • Pillows and Throws: These are a great way to add color, texture, and comfort to your living room.
      • Artwork: Choose artwork that you love and that complements your style. Hang it at eye level.
      • Plants: Plants add life and vibrancy to any space. They also help to purify the air.
    • Embrace Minimalism (or at Least “Less-Ism”): A minimalist approach is your secret weapon. By keeping surfaces clear and limiting the amount of clutter, you’ll instantly create a more spacious-feeling environment.
    dresser beside sofa

    Expert Tips & Resources for the Aspiring Interior Designer

    Here are a few expert tips to keep in mind:

    • The Power of Vertical Lines: Use vertical elements like bookshelves, tall mirrors, or even strategically placed artwork to draw the eye upward and create the illusion of height.
    • Transparency is Key: Choose furniture with clear or glass elements, like a glass coffee table or acrylic chairs. This allows light to pass through and creates a more open feel.
    • Optical Illusions: Use patterns and textures strategically to create living room illusions. For example, vertical stripes on the walls can make the room appear taller.
    • Consider a Multi-Functional Approach: Can your coffee table double as storage? Can your ottoman be used as extra seating? Multi-functional furniture is a lifesaver in small spaces.
    • Learn From the Pros: Websites like Houzz, Pinterest, and Apartment Therapy are fantastic resources for small living room ideas and inspiration.
    • Don’t Be Afraid to Experiment: Have fun with it! Try different arrangements, colors, and accessories until you find what works best for you and your space.

    Common Pitfalls to Avoid:

    • Overcrowding: This is the biggest mistake people make in small living rooms. Resist the urge to fill every corner with furniture and accessories.
    • Dark Colors: Dark colors absorb light, making the room feel smaller and more enclosed.
    • Ignoring Natural Light: Maximize natural light by keeping windows clean and uncovered.
    • Neglecting Storage: Adequate storage is essential for keeping clutter at bay.
    • Being Afraid to Ask for Help: If you’re feeling overwhelmed, don’t hesitate to consult with an interior designer.
    living room, interior design, modern, photo art, living room, living room, living room, living room, living room, interior design, interior design, interior design, interior design

    Conclusion & Next Steps: Your Journey to a More Spacious Living Room Starts Now!

    So, there you have it! A comprehensive guide to making your living room feel bigger and more inviting. Remember, it’s not about magic; it’s about smart design choices, clever small space living strategies, and a willingness to declutter and experiment.

    The key takeaways are:

    • Declutter, Declutter, Declutter!
    • Use light colors and maximize natural light.
    • Choose smaller-scale furniture and arrange it strategically.
    • Add mirrors to reflect light and create the illusion of more space.
    • Embrace minimalism and vertical storage.

    Now, it’s your turn. Take the first step today! Choose one small project from this list and commit to completing it this week. Whether it’s decluttering a shelf, repainting a small area, or rearranging your furniture, every little bit helps.

    I’d love to hear about your experiences! Share your tips, challenges, and successes in the comments below. And be sure to subscribe to my blog for more inspiring home improvement content.

    Until next time, happy decorating!

  • Is My Living Room Too Cluttered? Here’s How to Fix It

    Is My Living Room Too Cluttered? Here’s How to Fix It

    Hey everyone, Jonathan Miller here! Welcome back to the blog where we explore simple ways to transform your house into a home you truly love. I’m passionate about helping you create spaces that are not only beautiful but also functional and stress-free. Today, we’re tackling a common challenge: the dreaded cluttered living room. Is yours a source of comfort, or a source of chaos? Do you ask yourself: Is my living room too cluttered? If it’s the latter, don’t worry! We’ll explore some living room decluttering tips that can help you reclaim your space and create a sanctuary you’ll actually enjoy spending time in. Get ready for an engaging and hopefully, addictive read that will inspire you to take action!

    Why Home Improvement Matters (Especially Decluttering!)

    Before we dive into the nitty-gritty of how to declutter living room, let’s take a moment to understand why home improvement, especially decluttering, is so important. It’s more than just aesthetics; it’s about your well-being.

    • Increased Comfort and Well-being: A cluttered living room can be a major source of stress. Imagine constantly tripping over toys, having to dig through piles of magazines to find the remote, or feeling overwhelmed by the sheer volume of “stuff.” A decluttered space allows you to relax, breathe, and truly enjoy your downtime. Getting rid of living room clutter removes a significant mental and emotional burden.
    • A Space That Reflects Personal Style and Creativity: When your living room is buried under layers of clutter, your personal style gets lost in the mix. Decluttering tips help you create a blank canvas, allowing your personality to shine through. You can finally showcase those cherished photographs, display your favorite artwork, and arrange your furniture in a way that is both beautiful and functional. A living room makeover can breathe new life into your home and reflect who you truly are.
    • Empowerment Through Control: Taking control of your environment is incredibly empowering. When you declutter living room, you’re not just tidying up; you’re taking proactive steps to improve your overall quality of life. It’s a tangible demonstration of your ability to create positive change in your life.
    black wooden coffee table near white couch

    Understanding Your Home’s (and Your Living Room’s) Needs

    Okay, so you’re ready to tackle the cluttered living room. Fantastic! But before you start throwing things into boxes, let’s take a systematic approach. Here’s a step-by-step guide to assessing the current state of your living room:

    1. Observe and Identify: Take a good, hard look at your living room. What are the biggest culprits of clutter? Is it overflowing bookshelves? Piles of mail on the coffee table? Kids’ toys scattered everywhere? Identifying the problem areas is the first step to finding solutions. Are there signs of a cluttered living room that you notice immediately?
    2. Define Your Ideal Living Room: What do you want your living room to be? A cozy reading nook? A stylish entertainment space? A family-friendly hangout? Visualize your ideal space and write down a few key words that describe it (e.g., “calm,” “organized,” “inviting”).
    3. Set Realistic Goals: Don’t try to declutter everything in one day! Break down the task into smaller, more manageable chunks. For example, focus on decluttering one shelf, one drawer, or one corner of the room at a time.
    4. Prioritize Projects: Some decluttering tasks will have a bigger impact than others. Start with the areas that are causing the most stress or inconvenience. Clear the coffee table, organize the bookshelf, or fix cluttered living room issues that are directly impacting your daily life.
    couch, living room, furniture, chair, table, side table, indoors, interior design, room, sofa, interiors, home interior, house interior, home furniture, interior decoration, couch, living room, living room, living room, living room, furniture, furniture, furniture, furniture, furniture, chair, chair, table, table, table, table, interior design, interior design, room, room, sofa, sofa, sofa

    Budget-Friendly DIY Projects: Reclaim Your Space

    You don’t need to spend a fortune to transform your cluttered living room. Here are a few creative, affordable DIY projects that can make a big difference:

    • Repaint and Refresh: A fresh coat of paint can instantly brighten up a room and create a more inviting atmosphere. Choose a color that reflects your personality and complements your existing decor. This simple home improvement project can deliver dramatic results.
    • Upcycle Furniture: Instead of buying new furniture, consider upcycling existing pieces. Give an old coffee table a new coat of paint, reupholster a worn-out armchair, or transform a vintage trunk into a stylish storage container. Upcycling is a sustainable and budget-friendly way to add character to your living room.
    • DIY Storage Solutions: Get creative with storage! Repurpose old baskets, jars, or boxes to create stylish and functional storage solutions. Build simple shelves, hang hooks for coats and bags, or create a DIY ottoman with built-in storage.
    • Add Accent Pieces: Sometimes, all it takes is a few well-chosen accent pieces to elevate your living room. Add a cozy throw blanket, a colorful rug, or a statement piece of artwork. These small details can make a big impact on the overall look and feel of the room.

    Remember that tackling living room storage doesn’t have to be expensive. Look around your home for items that can be repurposed, or check out local thrift stores for hidden gems.

    living room, interior design, house, home, real estate, modern, living room, living room, living room, living room, living room

    Creating a Cozy, Inviting Space: The Finishing Touches

    Now that you’ve decluttered and organized your living room, it’s time to focus on creating a cozy and inviting atmosphere. Here are a few tips:

    • Color Palette: Choose a color palette that suits your personality and creates the desired mood. Warm colors like reds, oranges, and yellows can create a cozy and inviting atmosphere, while cool colors like blues, greens, and purples can create a calming and relaxing space.
    • Lighting: Lighting is crucial for creating the right ambiance. Use a combination of natural light, ambient lighting, and task lighting to create a well-lit and inviting space. Add lamps to create warm pools of light, and use dimmers to adjust the brightness to suit your mood.
    • Textures and Patterns: Mixing textures and patterns can add depth and visual interest to your living room. Combine soft textures like velvet and wool with rougher textures like wood and stone. Use patterns sparingly to avoid overwhelming the space.
    • Personalization: The key to creating a truly inviting space is to personalize it with items that reflect your personality and interests. Display your favorite books, photographs, and artwork. Add personal touches that make you feel happy and comfortable in your own home.
    living room, interior design, 3d rendered, 3d rendering, decor, decoration, furniture, apartment, home, house, stylish, contemporary, room, living room, living room, living room, living room, living room, room

    Expert Tips & Resources: A Little Help From the Pros

    Let’s explore some further expert tips for achieving optimal living room organization:

    • “One In, One Out” Rule: Whenever you bring something new into your living room, get rid of something old. This will help you prevent clutter from accumulating in the first place.
    • Vertical Storage: Maximize your vertical space by using tall bookshelves, wall-mounted shelves, or hanging organizers.
    • Designate Zones: Divide your living room into different zones for different activities (e.g., a reading zone, a TV zone, a play zone). This will help you keep things organized and prevent clutter from spreading throughout the room.
    • Utilize Hidden Storage: Look for furniture with built-in storage, such as ottomans, coffee tables, or benches.

    There are countless resources available online to help you with your home organization and decluttering tips journey. Websites like Pinterest, Houzz, and Apartment Therapy are great sources of inspiration. You can also find helpful articles and videos on YouTube. Don’t be afraid to experiment and find what works best for you.

    a living room filled with furniture and a fire place

    Conclusion & Next Steps

    So, there you have it – a comprehensive guide to transforming your cluttered living room into a cozy and inviting space. Remember, decluttering is not just about getting rid of stuff; it’s about creating a space that supports your well-being and reflects your personality.

    The key takeaways are:

    • Assess your living room’s needs and set realistic goals.
    • Start small and tackle one area at a time.
    • Utilize budget-friendly DIY projects to create functional and stylish storage solutions.
    • Focus on creating a cozy and inviting atmosphere with color, lighting, and textures.
    • Don’t be afraid to seek inspiration from experts and online resources.

    Now, I encourage you to take the first step toward your living room makeover. Start by decluttering one shelf, one drawer, or one corner of the room. You’ll be surprised at how much of a difference even a small change can make. Share your experiences in the comments below! What are your biggest decluttering challenges? What tips have worked best for you? And don’t forget to subscribe to my blog for more inspiring home improvement content. Happy decluttering!

  • Living Room Ideas 2025: Transform Your Space with Mirrors and Curtains – A Guide by Jonathan Miller

    Living Room Ideas 2025: Transform Your Space with Mirrors and Curtains – A Guide by Jonathan Miller

    Hey there, friends! Jonathan Miller here, your guide to crafting a living space that’s not just a room, but a reflection of you. Welcome to my corner of the internet, www.jonathanmiller.icu, where we explore smart, practical tips for elevating everyday living. Today, we’re diving deep into the heart of the home – the living room – and exploring how two seemingly simple elements, mirrors and curtains, can revolutionize your space. Get ready for some living room inspiration! This will be an addictive read packed with living room ideas for 2025 that you can implement today.

    Why Home Improvement Matters

    Let’s be honest, life can be hectic. Our homes should be our sanctuary, a place where we can recharge, connect with loved ones, and express our individuality. A well-improved home isn’t just about aesthetics; it’s about creating an environment that nurtures our well-being. Think about it: a decluttered space can reduce stress, a thoughtfully decorated room can spark joy, and a functional layout can simplify your daily routines. Taking control of your living environment is empowering. It’s an act of self-care that ripples through all aspects of your life.

    a living room filled with furniture and a large window

    Understanding Your Living Room’s Needs

    Before we jump into the fun stuff – choosing fabrics and hanging decorating with mirrors – let’s take a moment to assess your current living room. Grab a notebook and ask yourself these questions:

    • What are the biggest challenges in this space? Is it too dark? Too cluttered? Does it feel cramped?
    • What do you love about your living room? What elements do you want to keep and enhance?
    • What is the primary function of this room? Is it for family movie nights? Entertaining guests? A quiet reading nook?
    • What’s your overall style? Are you drawn to modern minimalism, cozy farmhouse, or something in between?

    Once you have a clear understanding of your living room’s strengths and weaknesses, you can set realistic goals. For instance, if your living room feels dark, your goal might be to “increase natural light and brighten the overall atmosphere.” Prioritize projects based on their potential impact. Addressing the biggest challenges first will yield the most significant results.

    brown wooden table with chairs

    Budget-Friendly DIY Projects: Mirrors and Curtains to the Rescue!

    Now for the exciting part! Even on a tight budget, you can achieve dramatic transformations using mirrors and curtains. Here are a few small living room ideas and general projects to get you started:

    • Mirror, Mirror on the Wall: A well-placed mirror can instantly brighten a room and create the illusion of more space.
      • Actionable Step: Hang a large mirror in your living room on a blank wall to reflect natural light. Position it opposite a window for maximum impact.
      • Value Added: Mirrors not only enhance aesthetics but also make a small living room feel larger and more open. Explore living room mirror ideas such as gallery walls with smaller decorative mirrors for a unique touch.
    • Curtains: The Fabric of Transformation: Curtains are more than just window coverings; they’re a design statement.
      • Actionable Step: Choose curtains in your living room that complement your color scheme and add texture. Consider the fabric’s weight and opacity to control light levels.
      • Value Added: Curtains can add warmth, privacy, and a touch of elegance to your living room. Explore different heading styles (pleated, grommet, rod pocket) to achieve the desired look. Think about layering sheer curtains with heavier drapes for versatility.
    • Upcycle and Reframe: Give old mirrors and curtains a new lease on life.
      • Actionable Step: Repaint an old mirror frame in a bold color or add decorative details. Hem old curtains to create new throw pillows or table runners.
      • Value Added: Upcycling is a sustainable and budget-friendly way to personalize your decor.
    white sectional couch beside black wooden table

    Creating a Cozy, Inviting Space: Color, Texture, and Personal Touches

    To create a truly inviting living room, pay attention to the interplay of color, texture, and personal elements.

    • Color Palette Perfection: Choose a color palette that reflects your personality and creates the desired mood. Cool blues and greens evoke tranquility, while warm reds and yellows create a cozy atmosphere.
    • Texture Tango: Mix and match textures to add depth and interest to your living room. Combine smooth fabrics like velvet with rough textures like jute or linen.
    • Personalization Power: Display items that tell your story – family photos, travel souvenirs, artwork that speaks to you. These personal touches will make your living room feel like a true reflection of your identity. A vase of fresh flowers can make a huge difference!
    brown sofa near white table lamp

    Expert Tips & Resources: Navigating the World of Design

    Let’s talk interior design trends  and living room trends for 2025. While trends can be a great source of inspiration, don’t feel pressured to follow them blindly. The most important thing is to create a space that you love.

    • Embrace Natural Light: Interior designers often emphasize the importance of maximizing natural light. Position your furniture to take advantage of windows and avoid blocking sunlight with heavy drapes. Consider using sheer living room curtains to let in as much light as possible.
    • Scale and Proportion: Pay attention to the scale and proportion of your furniture and decor. A large sofa can overwhelm a small room, while a tiny rug can get lost in a large space.
    • Online Inspiration: Websites like Pinterest, Houzz, and Instagram are treasure troves of living room inspiration. Create mood boards to gather ideas and visualize your dream living room. Search modern living room and living room design 2025 to gather modern inspiration.
    • Avoid Over-Decorating: Resist the urge to fill every corner with stuff. A cluttered living room can feel overwhelming and stressful. Less is often more. Try focusing on living room styling that minimizes clutter.
    black leather couch beside green potted plant

    The Future of Living Room Design: What to Expect in 2025

    As we look ahead to living room ideas and living room trends for 2025, expect to see a continued emphasis on sustainability, functionality, and personalization. Biophilic design, which incorporates natural elements into the home, will become even more popular. Expect to see more natural materials, indoor plants, and a focus on connecting with the outdoors. Minimalist design will continue to reign supreme, emphasizing clean lines, neutral colors, and a focus on essential elements. Multi-functional furniture and smart home technology will also play a key role in creating efficient and comfortable living spaces.

    As we venture into living room decor for 2025, remember that sustainability and personalization will reign supreme. Upcycled furniture, eco-friendly materials, and decor items that reflect your personal story will be key to creating a living room that is both stylish and meaningful.

    two green and orange plastic bottles

    Conclusion & Next Steps: Your Journey Starts Now!

    So, there you have it – a whirlwind tour of living room ideas, focusing on the transformative power of mirrors and decorating with curtains. Remember, creating a living room you love is a journey, not a destination. Don’t be afraid to experiment, make mistakes, and let your personality shine through.

    Ready to take the first step? Choose one small project – perhaps hanging a new mirror or swapping out your curtains – and see what a difference it makes.

    I’d love to hear about your home improvement adventures! Share your experiences in the comments below, and don’t forget to subscribe for more inspiring content from www.jonathanmiller.icu. Let’s create homes that are not only beautiful but also nurture our well-being and reflect the best versions of ourselves!

  • Taming the Tech Beast: Your Ultimate Guide to Entertainment Center Organization

    Taming the Tech Beast: Your Ultimate Guide to Entertainment Center Organization

    Hey there, friends! Jonathan Miller here, ready to help you transform your living space from chaotic to calming, one clever idea at a time. At www.jonathanmiller.icu, we’re all about offering inspiring, practical home improvement ideas that make your life easier and more enjoyable. And today, we’re tackling a particularly notorious area: the entertainment center.

    Let’s face it, the modern entertainment center can quickly become a black hole of tangled cords, lost remotes, and dust bunnies. But fear not! With a few simple strategies, you can achieve a tidy entertainment center that’s not only functional but also a visually appealing focal point in your home. Get ready for an engaging, addictive read – by the end of this, you’ll be itching to declutter your own space!

    Why Home Improvement Matters (Beyond the Aesthetics)

    Before we dive into the nitty-gritty of entertainment center organization, let’s take a moment to appreciate why home improvement matters in the first place. It’s more than just making your space look good (although that’s a definite perk!).

    • Increased Comfort and Well-being: A well-organized home reduces stress and creates a sense of calm. Think about it: how much more relaxed are you when you’re not tripping over cords or searching frantically for the remote?
    • A Space That Reflects Personal Style and Creativity: Your home is an extension of yourself. Taking the time to improve it allows you to express your personality and create a space that truly feels like you.
    • Empowerment Through Control: There’s a real sense of accomplishment that comes from taking control of your environment. It’s a powerful feeling to transform a chaotic space into an organized, functional one. By learning how to tidy entertainment center and implement effective cord management solutions, you are one step closer to a more tranquil life.
    turned off black television

    Understanding Your Home’s Entertainment Needs: A Strategic Assessment

    Okay, let’s get practical. Before you start yanking everything out of your TV console organization, take a step back and assess the situation.

    1. Identify Areas That Need Improvement: What are your biggest pain points? Is it the overwhelming mass of organizing cables? The perpetually missing remote control organizer? The general dustiness of your media center organization?
    2. Set Realistic and Clear Goals: Don’t try to overhaul everything at once. Start with one or two manageable goals. For example: “I will eliminate cable clutter and create a designated storage space for remotes.”
    3. Prioritize Projects for Maximum Impact: Which improvements will give you the most bang for your buck? Addressing the cable management situation is often a great place to start, as it instantly improves the visual appeal and functionality of your entertainment center. This can include DIY cable management projects, or simply purchasing cord management solutions.

    Budget-Friendly DIY Projects to Tame the Tech

    You don’t need to spend a fortune to achieve home theater organization bliss. Here are a few creative, affordable DIY projects you can tackle this weekend:

    • The Cardboard Box Cord Corral: Cut holes in a cardboard box to feed cords through, creating a simple and effective way to hide excess cable length. This is a great starting point to hide cables.
    • Upcycled Toilet Paper Roll Organizers: Decorate empty toilet paper rolls and use them to bundle and label individual cords. This is a cheap and effective way for organizing cables.
    • DIY Remote Control Caddy: Repurpose a mason jar or small basket to create a designated remote control storage solution.
    • Fabric-Covered Cord Concealer: Wrap unsightly cords in decorative fabric to blend them into your decor.

    These projects add both aesthetic and functional value, transforming your entertainment system organization.

    A hand organizing a desk with a basket of electronics including a charger and smartphone.

    Creating a Cozy, Inviting Entertainment Space

    Your entertainment center should be more than just a place to house your electronics; it should be a welcoming and inviting space.

    • Color and Lighting: Use warm, neutral colors to create a calming atmosphere. Add soft lighting to enhance the cozy feel. Consider the light reflecting from the TV onto lighter colored walls.
    • Textures and Patterns: Mix textures and patterns to add visual interest. Throw pillows, blankets, and decorative accessories can soften the look of your home entertainment setup.
    • Personalization is Key: Add personal touches like photos, artwork, and decorative objects to make the space your own. Don’t be afraid to get rid of things. To declutter entertainment center, getting rid of unnecessary decorative items will help you focus on what you truly love and value.
    • Entertainment Center Ideas: Consider adding floating shelves above or beside your entertainment center to display books or decorative items. A well-placed plant can also add a touch of nature to your space.
    turned on flat screen TV inside room

    Expert Tips & Resources for Entertainment Center Success

    Here are some insights from interior design experts that are easy to implement:

    • Use Velcro Straps and Cable Ties: These are your best friends when it comes to organizing cables. Bundle and secure cords to prevent tangling and keep them out of sight.
    • Label Everything: Labeling cords with a label maker (or even just a piece of tape) will save you countless headaches down the road.
    • Invest in a Power Strip with Surge Protection: This is a must for protecting your valuable electronics.
    • Utilize Wall Mounts: If possible, mount your TV and other devices to the wall to free up space and create a cleaner look.
    • Think Vertically: Utilize vertical space with shelves and storage units to maximize your storage capacity. Entertainment center ideas should incorporate storage solutions.

    Common Pitfalls and How to Avoid Them:

    • Ignoring Cable Management: This is the biggest mistake people make. Don’t underestimate the power of good cable management.
    • Overcrowding the Space: Resist the urge to cram too much stuff into your entertainment center. Less is more.
    • Neglecting Dusting: Dust regularly to keep your electronics clean and functioning properly.

    Recommended Resources:

    • Pinterest: Endless inspiration for entertainment center ideas and organization tips.
    • The Container Store: A great source for storage solutions and organization products.
    • Amazon: A wide variety of cord management solutions and accessories.
    Zootopia movie still

    Conclusion & Next Steps: Your Path to an Organized Entertainment Center

    So there you have it! A comprehensive guide to transforming your entertainment center from a chaotic mess to a haven of organized bliss. Remember, the key is to start small, be patient, and don’t be afraid to experiment.

    Key Takeaways:

    • Assess your needs and set realistic goals.
    • Embrace DIY projects for budget-friendly solutions.
    • Prioritize cable management.
    • Personalize your space to create a welcoming atmosphere.

    Now it’s your turn! Take the first step towards a more organized and enjoyable living space. Start by decluttering your entertainment center and implementing a few of the tips we’ve discussed. Remember that creating a tidy entertainment center can have a large impact on how you enjoy that space, as well as increase your peace of mind.

    We’d love to hear about your experiences! Share your before-and-after photos and any other entertainment center hacks you’ve discovered in the comments below. And be sure to subscribe to www.jonathanmiller.icu for more inspiring home improvement content! Let’s work together to create homes that are both beautiful and functional. Happy organizing!

  • Bedroom Decluttering: Tips for a Serene Space

    Bedroom Decluttering: Tips for a Serene Space

    Your bedroom should be a sanctuary—a place where you can unwind, recharge, and find peace after a long day. But when clutter creeps in, it can turn your haven into a source of stress. The good news? Bedroom decluttering can transform your space into a serene space that nurtures your well-being. A calm room equals a happy mind, and with these simple tips, you’ll be on your way to a clutter-free, tranquil bedroom in no time.

    Why Bedroom Decluttering Matters

    A cluttered bedroom does more than just take up space—it can weigh on your mind. Piles of clothes, overflowing nightstands, and hidden messes can make it hard to relax or sleep well. On the flip side, a calm bedroom promotes mental clarity, reduces stress, and sets the stage for restful nights. Bedroom decluttering isn’t just about tidying up; it’s about creating an environment that supports a happy, peaceful mind.

    white bed with gray and white bed linen

    Step 1: Assess Your Space

    Before you start, take a moment to evaluate your bedroom. Stand in the doorway and scan the room. What feels out of place? Where does clutter tend to pile up? Here are some common trouble spots to look for:

    • Clothes draped over chairs or spilling out of the closet
    • Nightstands cluttered with books, chargers, and random items
    • Drawers packed with unused accessories or odds and ends
    • Under-bed areas stuffed with forgotten boxes or bags

    Identifying these areas gives you a clear starting point for your bedroom decluttering journey.

    blue and brown textile on white bench chair

    Step 2: Declutter Step-by-Step

    Decluttering doesn’t have to be overwhelming. Break it down into manageable steps to organize your bedroom effectively:

    1. Start with Clothes:
      • Pull everything out of your closet and drawers, then pile it on your bed. Sort into three categories: keep, donate, or discard. Keep only what you love and wear regularly.
    2. Clear the Surfaces:
      • Tackle your nightstand, dresser, and any other flat surfaces. Limit what stays to essentials—a lamp, a book, or a small plant. Everything else should go.
    3. Dig Into Hidden Clutter:
      • Check drawers, under the bed, and inside storage bins. Be ruthless—keep only what you use and need.
    4. Handle Sentimental Items Last:
      • These can tug at your heartstrings. Ask yourself if they belong in your bedroom or if they’d be better stored elsewhere.

    Pro Tip: Struggling to part with clothes? Try the “hanger trick”—turn all hangers backward and flip them forward when you wear an item. After a few months, donate what’s still facing the wrong way.

    white button up shirt on brown clothes hanger

    Step 3: Organize What’s Left

    Once the excess is gone, it’s time to organize your bedroom for lasting calm. Here’s how:

    • Use Smart Storage:
      • Baskets, shelves, or under-bed containers keep items tucked away but accessible.
    • Give Everything a Home:
      • Assign a specific spot for every item to prevent future clutter.
    • Keep Surfaces Simple:
      • A minimal nightstand or dresser—just a few functional or meaningful pieces—creates a serene space.

    Quick Tip: Drawer dividers are a game-changer for keeping socks, jewelry, or cables neatly separated.

    white wooden dresser with mirror

    Step 4: Maintain the Calm

    A calm bedroom stays that way with small, consistent habits:

    • Make Your Bed Daily:
      • It’s a quick win that instantly tidies the room.
    • Put Things Away Right Away:
      • Used it? Return it to its spot immediately.
    • Weekly Check-In:
      • Spend 10 minutes each week straightening up.
    • Seasonal Refresh:
      • Every few months, do a mini-declutter to keep things under control.

    Bonus Tip: Keep a small trash bin and donation box handy in your closet. Toss or donate items the moment you realize they’re no longer needed.

    black alarm clock at 10:10 on white wooden table near table

    Bonus Tips for a Serene Bedroom

    Take your bedroom decluttering further with these calming touches:

    • Choose Soothing Colors:
      • Soft neutrals like white, beige, or light gray enhance the peaceful vibe.
    • Add a Touch of Nature:
      • A low-maintenance plant or succulent brings life without clutter.
    • Opt for Gentle Lighting:
      • Warm bulbs or a bedside candle create a cozy, relaxing glow.
    bedroom, hotel room, bed, bed sheets, beddings, pillows, interiors, interior decoration, interior design, white sheets, wall art, lodging, hotel, room, bedroom, bedroom, bedroom, hotel room, bed, bed, hotel, hotel, hotel, hotel, hotel, room, room

    Conclusion

    A clutter-free bedroom is a gift to yourself—a space where your mind can rest and recharge. With these bedroom decluttering tips, you’ll craft a serene space that brings calm to your days and nights. A calm room truly equals a happy mind. Start small, stay consistent, and enjoy the peace that comes with an organized bedroom.

    As Marie Kondo puts it, “The space in which we live should be for the person we are becoming now, not for the person we were in the past.” Let your bedroom reflect the calm, happy you.


    Quick Recap of the Steps

    • Assess your bedroom’s clutter zones.
    • Declutter in small, focused steps.
    • Organize for simplicity and serenity.
    • Maintain with easy daily habits.

  • Pantry Organization Ideas for Every Budget: Cheap Bins to Fancy Setups

    Pantry Organization Ideas for Every Budget: Cheap Bins to Fancy Setups

    A cluttered pantry can turn meal prep into a frustrating scavenger hunt. But with the right pantry organization strategies, you can transform your space into a functional, stress-free zone—whether you’re on a tight budget or ready to splurge. From budget-friendly pantry ideas like repurposed containers to luxury pantry setups with custom shelving, there’s a solution for everyone.

    In this guide, we’ll share pantry organization ideas for every budget, helping you create a space that saves time, reduces stress, and makes cooking a joy. No matter your budget, these tips will help you organize your pantry like a pro. Let’s dive in!

    Why Pantry Organization Matters

    Before we get into the ideas, let’s talk about why pantry organization is so important:

    • Saves Time: No more digging through piles of cans or bags to find what you need.
    • Reduces Stress: A tidy pantry makes meal planning and grocery shopping easier.
    • Prevents Waste: Clear organization helps you see what you have, reducing the chance of buying duplicates or letting food expire.
    • Maximizes Space: Even small pantries can feel spacious with the right setup.

    Now, let’s explore pantry organization ideas for every budget.

    a shelf filled with lots of different types of spices

    Budget-Friendly Pantry Ideas (Under $50)

    You don’t need to spend a fortune to get your pantry in order. These budget-friendly pantry ideas use affordable or repurposed items to create a functional space.

    • Mason Jars: Perfect for storing dry goods like rice, pasta, or oats. They’re cheap, airtight, and easy to label.
    • Clear Plastic Bins: Group similar items (e.g., snacks, baking supplies) in clear bins for easy access. Look for deals at dollar stores or discount retailers.
    • Repurposed Containers: Use empty coffee cans, shoeboxes, or cereal boxes (cut and covered with contact paper) to create custom storage.
    • Label Everything: Use a label maker or printable labels to identify contents quickly.

    Pro Tip: Check thrift stores for affordable baskets or bins—they often have unique finds at a fraction of the cost.

    three clear glass jars with brown and white stones

    Mid-Range Pantry Solutions ($50-$200)

    If you’re willing to invest a bit more, these mid-range options offer style and functionality without breaking the bank.

    • Matching Glass Jars: Invest in a set of glass jars with airtight lids for a cohesive look. They’re perfect for storing flour, sugar, or snacks.
    • Wire Baskets: Use stackable wire baskets to organize canned goods or produce. They’re durable and allow airflow.
    • Lazy Susans: Ideal for corner cabinets or deep shelves, lazy Susans make it easy to access spices, oils, or condiments.
    • Shelf Risers: Double your shelf space with affordable shelf risers, perfect for stacking plates, bowls, or canned goods.

    Quick Tip: Look for sales or bulk deals on storage sets to get more for your money.

    clear glass canister lot on table

    Luxury Pantry Setups ($200+)

    For those ready to splurge, these luxury pantry setups offer custom solutions and high-end materials for a sleek, modern look.

    • Custom Shelving Units: Hire a carpenter or use a modular system to create shelves tailored to your pantry’s dimensions.
    • Pull-Out Drawers: Install pull-out drawers for easy access to deep pantry items like small appliances or bulk goods.
    • Wood or Metal Accents: Opt for high-end materials like wood shelving or metal baskets for a polished, designer feel.
    • Dedicated Pantry Room: If space allows, convert a small room or large closet into a walk-in pantry with floor-to-ceiling storage.

    Space-Saver Alert: Consider installing a sliding barn door to save space and add a stylish touch to your luxury pantry.

    brown wooden shelf with bottles

    Practical Pantry Organization Tips for Any Budget

    No matter your budget, these universal tips will help you maintain a well-organized pantry:

    • Group Similar Items: Store baking supplies, snacks, and canned goods together for easy access.
    • Use Clear Containers: Visibility is key—clear jars or bins let you see what you have at a glance.
    • Label Everything: Whether you use a label maker or handwritten tags, labels keep your system organized.
    • Regularly Declutter: Every few months, check for expired items or duplicates and remove what you don’t need.
    • Maximize Vertical Space: Use stackable bins, shelf risers, or over-the-door organizers to make the most of your pantry’s height.

    Pro Tip: Keep a small step stool nearby to easily reach high shelves without hassle.

    clear glass jar lot on shelf

    DIY Pantry Organization Ideas

    For those who love a hands-on approach, these DIY pantry organization ideas add a personal touch to your space:

    • Chalkboard Wall: Paint one pantry wall with chalkboard paint for a stylish grocery list or meal planner.
    • Pegboard Storage: Install a pegboard on the back of your pantry door to hang small tools, utensils, or even lightweight baskets.
    • Custom Labels: Create your own labels with printable templates or hand-lettering for a unique, cohesive look.

    DIY Tip: Repurpose old wooden crates or pallets into rustic shelves for a budget-friendly, custom storage solution.

    a shelf filled with lots of different types of spices

    Maintaining Your Organized Pantry

    Organization is an ongoing process. Here’s how to keep your pantry in top shape:

    • Clean as You Go: Wipe down shelves and containers regularly to prevent crumbs and spills.
    • Weekly Check-In: Spend 5-10 minutes each week straightening up and checking for expired items.
    • Involve the Household: Make sure everyone knows the system and returns items to their proper place.
    • Seasonal Refresh: Every few months, do a mini-declutter and adjust your setup as needed.

    Bonus Tip: Keep a small “miscellaneous” bin for odds and ends, but don’t let it become a catch-all—clean it out regularly.

    a shelf filled with lots of food items

    Conclusion

    Organizing your pantry doesn’t have to be expensive or overwhelming. With these pantry organization ideas for every budget, you can create a space that’s functional, stylish, and tailored to your needs. Whether you’re using cheap bins or investing in a luxury setup, the key is to start small and build a system that works for you. Remember, even a few simple changes can make a big difference in your daily routine.

    Ready to transform your pantry? Pick one or two ideas from this guide and get started today. Your future self will thank you!

    Quick Recap of the Ideas

    • Budget-Friendly: Mason jars, clear bins, repurposed containers.
    • Mid-Range: Matching glass jars, wire baskets, lazy Susans.
    • Luxury: Custom shelving, pull-out drawers, high-end materials.
    • DIY: Chalkboard walls, pegboards, custom labels.
  • How to Organize Your Kitchen Like a Pro: Layout Tips and Must-Have Tools

    How to Organize Your Kitchen Like a Pro: Layout Tips and Must-Have Tools

    A cluttered kitchen can turn cooking into a chore and make even the simplest tasks feel overwhelming. But with the right kitchen organization strategies, you can transform your space into a functional, stress-free zone where everything has its place. Whether you’re a seasoned chef or just want to make meal prep easier, organizing your kitchen like a pro is within reach.

    In this guide, we’ll share layout tips and must-have tools to help you organize your kitchen for maximum efficiency. From decluttering to optimizing your layout, these steps will save you time, reduce stress, and make your kitchen a joy to use. Let’s get started!

    Why Kitchen Organization Matters

    Before we dive into the how-to, let’s talk about why kitchen organization is so important:

    • Saves Time: No more hunting for that elusive spatula or digging through drawers for the right lid.
    • Reduces Stress: A tidy kitchen makes cooking and cleaning less chaotic.
    • Boosts Efficiency: With everything in its place, you can move seamlessly from prep to cooking to serving.
    • Maximizes Space: Even small kitchens can feel spacious with the right organization.

    Now, let’s explore how to organize your kitchen like a pro.

    Spacious, light-filled kitchen with modern design and fresh herbs on the counter.

    Step 1: Declutter Your Kitchen

    The first step to any organization project is decluttering. It’s tough, but it’s essential. Here’s how to do it without feeling overwhelmed:

    • Empty Everything: Pull out all items from your cabinets, drawers, and pantry. Lay them out on your counter or table.
    • Sort into Categories: Group similar items together—pots and pans, utensils, baking supplies, etc.
    • Ask Key Questions: For each item, ask, “Do I use this regularly?” and “Does this still work?” If not, it’s time to donate or discard.
    • Be Ruthless with Duplicates: You don’t need three can openers or five spatulas. Keep only what you use.

    Pro Tip: If you’re unsure about an item, put it in a “maybe” box and revisit it in a few months. If you haven’t missed it, let it go.

    Artistic assortment of hanging kitchen cookware and utensils on a wooden rack indoors.

    Step 2: Optimize Your Kitchen Layout

    A well-thought-out kitchen layout is the backbone of an organized space. Here’s how to make it work for you:

    • The Work Triangle: Arrange your stove, sink, and refrigerator in a triangle shape to minimize movement between key areas.
    • Zone Your Kitchen: Create distinct zones for different tasks:
      • Prep Zone: Near the sink with cutting boards, knives, and mixing bowls.
      • Cooking Zone: Close to the stove with pots, pans, and cooking utensils.
      • Storage Zone: Pantry or cabinets for dry goods, spices, and small appliances.
    • Use Vertical Space: Install shelves or hooks to store items like mugs, pots, or even hanging baskets for produce.

    Quick Tip: Keep frequently used items within arm’s reach and store rarely used items (like holiday dishes) in harder-to-reach spots.

    cookware set on floating shelves

    Step 3: Organize by Category

    Once your layout is set, it’s time to organize your kitchen by category. This keeps everything logical and easy to find.

    • Group Like with Like: Store all baking sheets together, group spices by type, and keep snacks in one spot.
    • Use Clear Containers: Transfer dry goods like pasta, rice, or cereal into clear, airtight containers for easy identification.
    • Label Everything: Use labels on bins, jars, and shelves to maintain order and make it easy for others to find (and return) items.

    Space-Saver Alert: Stackable containers and nesting bowls are your best friends in a small kitchen.

    Modern white kitchen with sleek cabinets and stainless steel appliances, leading to a bright living area.

    Step 4: Must-Have Tools for Kitchen Organization

    The right tools can make or break your kitchen organization efforts. Here are some must-have kitchen tools to keep your space tidy and efficient:

    • Drawer Dividers: Perfect for organizing utensils, measuring spoons, and small gadgets.
    • Lazy Susans: Ideal for corner cabinets or pantry shelves to access spices, oils, or canned goods easily.
    • Clear Bins: Use them in the pantry or fridge to group similar items (e.g., snacks, sauces).
    • Pull-Out Shelves: Install these in lower cabinets to avoid digging through pots and pans.
    • Magnetic Strips: Mount them on the wall to hold knives or metal utensils, freeing up drawer space.

    Pro Tip: Invest in multi-functional tools, like a cutting board with built-in storage or stackable measuring cups, to save space.

    Extra Tip: Read this article 5 Must-Have Tools for a Tidy Kitchen

    an open drawer in a kitchen filled with dishes

    Step 5: Maintain Your Organized Kitchen

    Organization isn’t a one-time event—it’s an ongoing process. Here’s how to keep your kitchen in pro-level shape:

    • Clean as You Go: Wipe down surfaces and put items back immediately after use.
    • Weekly Check-In: Spend 10 minutes each week straightening up drawers, cabinets, and the pantry.
    • Seasonal Declutter: Every few months, reassess your kitchen items and donate or discard what’s no longer needed.
    • Involve the Household: Make sure everyone knows the system and where things belong.

    Bonus Tip: Keep a small “junk drawer” for odds and ends, but limit it to one drawer and clean it out regularly.

    white over-the-range oven

    Bonus Tips for Small Kitchens

    If you’re working with a small kitchen, these extra tips will help you maximize every inch:

    • Use the Inside of Cabinet Doors: Install hooks or small racks for pot lids, measuring spoons, or cleaning supplies.
    • Go Vertical: Add a pegboard or wall-mounted shelves for extra storage without taking up counter space.
    • Opt for Compact Appliances: Choose smaller versions of essentials like a mini food processor or a slim toaster.
    white front load washing machine

    Conclusion

    Organizing your kitchen like a pro doesn’t have to be complicated. With these kitchen organization tips and must-have tools, you’ll create a space that’s efficient, clutter-free, and a joy to cook in. Start with decluttering, optimize your layout, and invest in a few key tools to keep everything in its place. Remember, a well-organized kitchen saves time, reduces stress, and makes cooking fun again.

    Ready to transform your kitchen? Pick one or two tips from this guide and get started today. Your future self will thank you!

    Quick Recap of the Steps

    • Declutter your kitchen.
    • Optimize your kitchen layout with zones and the work triangle.
    • Organize by category and use clear containers.
    • Invest in must-have tools like drawer dividers and lazy Susans.
    • Maintain your system with daily habits and regular check-ins.
  • Meal Prep Organization: Save Time and Space

    Meal Prep Organization: Save Time and Space

    Meal prepping is a game-changer for busy weeks, but without the right organization, it can feel like a chaotic mess. Between juggling recipes, ingredients, and storage, it’s easy to get overwhelmed. The good news? With a few simple meal prep organization strategies, you can save time, reduce stress, and make the most of your kitchen space. Whether you’re a seasoned meal prepper or just starting out, these tips will help you streamline your process and keep your kitchen clutter-free.

    In this guide, we’ll share practical kitchen hacks to help you save time and space while meal prepping. From planning your meals to storing them efficiently, these tips will make your routine smoother and more enjoyable. Let’s dive in!

    Why Meal Prep Organization Matters

    Before we get into the tips, let’s talk about why meal prep organization is so important:

    • Saves Time: A well-organized plan means less time spent figuring out what to cook each day.
    • Reduces Stress: Knowing exactly what’s in your fridge and where to find it eliminates last-minute chaos.
    • Maximizes Space: Smart storage solutions help you make the most of even the smallest kitchen.
    • Prevents Waste: Clear organization reduces the chance of forgetting about ingredients or overbuying.

    Now, let’s explore how to organize your meal prep like a pro.

    six full clear glass jars on white surface

    Step 1: Plan Your Meals and Shopping List

    The foundation of meal prep organization is a solid plan. Here’s how to get started:

    • Create a Weekly Menu: Decide on your meals for the week, including breakfast, lunch, dinner, and snacks. Keep it simple—stick to recipes you know and love.
    • Make a Shopping List: Based on your menu, list out all the ingredients you’ll need. Organize the list by grocery store sections (e.g., produce, dairy) to save time while shopping.
    • Batch Your Cooking: Plan to cook multiple meals at once. For example, roast a tray of veggies while your protein is baking to maximize oven time.

    Pro Tip: Use a meal planning app or a simple spreadsheet to keep track of your menus and shopping lists. It’s a game-changer for staying organized.

    a notepad with a green pen sitting on top of it

    Step 2: Optimize Your Kitchen Layout

    A well-organized kitchen makes meal prepping faster and more efficient. Here’s how to set up your space:

    • Designate Prep Zones: Create specific areas for chopping, mixing, and cooking. Keep your cutting board near the sink for easy cleanup.
    • Store Tools Within Reach: Keep frequently used tools like knives, measuring cups, and spatulas in a drawer or on the counter near your prep area.
    • Use Vertical Space: Install hooks or magnetic strips to hang utensils, pots, or even spice jars, freeing up counter and drawer space.

    Quick Tip: If your kitchen is small, consider a rolling cart for extra storage and workspace. It’s a lifesaver for tight spaces.

    person cutting vegetables with knife

    Step 3: Master Your Storage Game

    Proper storage is key to keeping your meal prep organized and your kitchen clutter-free. Here’s how to do it:

    • Use Clear Containers: Invest in clear, airtight containers for storing prepped meals and ingredients. Being able to see what’s inside saves time and reduces waste.
    • Label Everything: Use a label maker or masking tape to mark containers with the meal name and date. This helps you grab the right meal quickly and track freshness.
    • Stack Smartly: Opt for stackable containers to save space in your fridge or pantry. Square or rectangular shapes maximize storage better than round ones.

    Space-Saver Alert: Use the back of your fridge door for small items like sauces or snacks in clear bins.

    green and pink plastic container

    Step 4: Must-Have Tools for Meal Prep Organization

    The right tools can make all the difference in your meal prep routine. Here are some must-have kitchen tools to keep things tidy and efficient:

    • Good Knives and a Spacious Cutting Board: Sharp knives and a large cutting board make chopping faster and safer.
    • Sheet Pans and Baking Dishes: Perfect for batch cooking proteins and veggies in the oven.
    • Mason Jars or Small Containers: Great for storing sauces, dressings, or pre-portioned snacks.
    • Meal Prep Bags or Containers with Compartments: These keep different meal components separate and organized.

    Pro Tip: A slow cooker or Instant Pot can be a lifesaver for hands-off cooking while you prep other meals.

    a person chopping onions on a cutting board

    Step 5: Maintain Your System

    Organization is an ongoing process. Here’s how to keep your meal prep routine running smoothly:

    • Prep in Batches: Set aside a specific day (like Sunday) for meal prepping. Cook multiple meals at once to save time.
    • Clean as You Go: Wipe down surfaces and put tools away immediately after use to avoid a post-prep mess.
    • Weekly Check-In: Spend 10 minutes each week organizing your fridge and pantry, checking for expired items or leftovers that need to be used.
    • Involve the Household: If you share your kitchen, make sure everyone knows the system and where things belong.

    Bonus Tip: Keep a small “snack bin” in your fridge or pantry for quick, grab-and-go options. It’s perfect for busy days.

    kitchen, modern kitchen, furniture, house, interior, cook, kitchenette, interior furnishings, mobile, table, kitchen, kitchen, kitchen, kitchen, kitchen, modern kitchen, modern kitchen

    Bonus Tips for Small Kitchens

    If you’re working with a small kitchen, these extra tips will help you maximize every inch:

    • Use the Inside of Cabinet Doors: Install hooks or small racks for measuring spoons, pot holders, or spice jars.
    • Go Vertical: Add a pegboard or wall-mounted shelves for extra storage without taking up counter space.
    • Opt for Multi-Use Tools: Choose items like a blender that doubles as a food processor or stackable measuring cups to save space.
    white front load washing machine

    Conclusion

    Meal prepping doesn’t have to be a chaotic, time-consuming task. With these meal prep organization tips, you’ll save time, reduce stress, and make the most of your kitchen space. Start with a solid plan, optimize your layout, and invest in a few key tools to keep everything running smoothly. Remember, even small changes can make a big difference in your routine.

    Ready to transform your meal prep game? Try one or two of these kitchen hacks today and see how much easier your week becomes. Your future self will thank you! Have your own meal prep tips? Drop them in the comments below—I’d love to hear what works for you!

    Quick Recap of the Steps

    • Plan your meals and shopping list.
    • Optimize your kitchen layout with prep zones and vertical storage.
    • Master storage with clear containers and labels.
    • Invest in must-have tools like good knives and sheet pans.
    • Maintain your system with batch prepping and regular check-ins.
  • 5 Must-Have Tools for a Tidy Kitchen

    5 Must-Have Tools for a Tidy Kitchen

    A tidy kitchen is not only visually appealing but also makes cooking and meal preparation more efficient. With the right kitchen organization tools, you can transform your kitchen into a well-organized space where everything is easy to find. In this post, we’ll explore five must-have kitchen organization tools that will help you achieve a clutter-free kitchen. Think drawer dividers and lazy Susans—these essential kitchen organization tools will streamline your efforts and keep your kitchen spotless.

    Why Kitchen Organization Matters

    Before diving into the tools, let’s highlight why a tidy kitchen is worth the effort:

    • Saves Time: No more hunting for lost utensils or spices.
    • Reduces Stress: A clutter-free space makes cooking enjoyable, not chaotic.
    • Boosts Efficiency: Organized tools mean smoother meal prep.
    • Maximizes Space: Even tiny kitchens feel bigger with smart storage.

    Ready to get started? Here are the top five tools you need for a tidy kitchen.

    kitchen house area

    1. Drawer Dividers

    Drawer dividers are adjustable inserts that bring order to your kitchen drawers. Perfect for sorting utensils, cutlery, and small gadgets, they create designated sections so you can grab what you need without digging through a jumbled mess. Whether it’s a small drawer for forks and spoons or a larger one for spatulas and whisks, drawer dividers can be tailored to fit. Affordable and simple to install, they’re a game-changer for kitchen organization and a must-have for any tidy space.

    a drawer with utensils and spoons in it

    2. Lazy Susans

    A lazy Susan is a rotating tray that makes hard-to-reach items accessible with a quick spin. Ideal for storing spices, condiments, or even cleaning supplies, it’s a lifesaver in deep cabinets or corner spaces where things tend to disappear. Available in various sizes and materials, you can find a lazy Susan to suit any countertop or cabinet. Adding this to your kitchen organization tools lineup saves time and keeps everything within reach—perfect for a tidy kitchen.

    These kitchen organization tools are specifically designed to enhance convenience and efficiency, ensuring that your kitchen remains functional and organized.

    Lazy Susan build into a corner in a kitchen

    3. Cabinet Organizers

    Incorporating kitchen organization tools like these can make your meal prep smoother and more enjoyable.

    Cabinet organizers come in handy forms like pull-out shelves, tiered racks, or lid holders. They maximize cabinet space by neatly stacking pots, pans, and lids, keeping them both accessible and organized. Pull-out shelves bring items from the back forward, while tiered racks elevate spices or cans, and lid holders tame unruly pot lids. Investing in cabinet organizers is a smart move to declutter and enhance your kitchen organization, making every inch of storage count. By utilizing effective kitchen organization tools, you can manage your kitchen space better and reduce clutter.

    an open drawer in a kitchen filled with dishes

    4. Shelf Risers

    Shelf risers are small shelves that double your cabinet’s vertical space. Place them inside to create extra levels for plates, bowls, or pantry items like jars and boxes. By lifting items off the cabinet floor, shelf risers make everything visible and easy to grab—no more cluttered stacks. Affordable and effortless to set up, they’re an essential tool for kitchen organization and a key player in maintaining a tidy kitchen.

    These kitchen organization tools are not only practical but add to the aesthetic appeal of your kitchen.

    cookware set on floating shelves

    5. Clear Storage Containers

    Investing in quality kitchen organization tools ensures that you maximize your kitchen storage efficiently.

    Clear storage containers are pantry superheroes, keeping dry goods like pasta, rice, and cereal fresh and visible. Transferring items into these airtight containers lets you see what’s on hand and how much remains, cutting down on waste and pest problems. Available in all shapes and sizes, they fit any shelf, and adding labels with contents or expiration dates takes your kitchen organization to the next level. For a tidy kitchen, these containers are non-negotiable.

    assorted spices in clear glass jars

    Conclusion

    A tidy kitchen is within reach when you use the right kitchen organization tools. With drawer dividers, lazy Susans, cabinet organizers, shelf risers, and clear storage containers, you can craft a functional, beautiful space where everything has its place. These essential kitchen organization tools make cooking and cleaning a breeze, turning chaos into calm. Start organizing your kitchen today with the best kitchen organization tools and enjoy the perks of a clutter-free life!

    Got your own tidy kitchen tricks? Share them in the comments below or explore our other posts for more home organization inspiration.

  • 5 Clever Ways to Store Accessories in Your Closet: Think Jewelry, Belts, and Scarves

    5 Clever Ways to Store Accessories in Your Closet: Think Jewelry, Belts, and Scarves

    Accessories can make or break an outfit, but storing them properly can be a challenge. If your jewelry is tangled, your belts are scattered, and your scarves are wrinkled, it’s time to rethink your accessory storage. A well-organized closet not only saves time but also helps protect your favorite pieces from damage.

    In this post, we’ll share 5 clever ways to store accessories in your closet—specifically jewelry, belts, and scarves. These closet organization hacks are simple, budget-friendly, and perfect for small spaces. Let’s transform your closet into a functional and stylish haven!

    Why Accessory Storage Matters

    Before we dive into the solutions, here’s why proper accessory storage is essential:

    • Prevents Damage: Proper storage keeps jewelry untangled, belts unbuckled, and scarves wrinkle-free.
    • Saves Time: No more hunting for matching earrings or the right belt—everything is easy to find.
    • Maximizes Space: Clever storage solutions make the most of your closet’s available space.
    • Enhances Aesthetics: A tidy accessory display can elevate the look of your closet.

    Now, let’s explore five smart ways to store your accessories.

    a box filled with lots of different types of rings

    1. Jewelry: Keep It Untangled and Accessible

    Jewelry is often the trickiest accessory to store, but with the right system, you can keep it organized and damage-free.

    • Jewelry Organizers: Invest in a hanging jewelry organizer with clear pockets. These can be hung on the back of your closet door or on a rod, keeping necklaces, earrings, and bracelets visible and untangled.
    • Drawer Dividers: If you have a dresser in your closet, use drawer dividers or small trays to separate rings, earrings, and delicate chains.
    • Wall-Mounted Hooks: For statement necklaces or chunky bracelets, install small hooks on the closet wall to hang them individually.

    Pro Tip: Use a corkboard or pegboard for a customizable jewelry display that doubles as decor.

    gold-and-silver-colored pendant necklace

    2. Belts: From Rolled to Hung

    Belts can easily become a jumbled mess, but these storage solutions will keep them neat and accessible.

    • Belt Hooks: Install a belt hanger with multiple hooks on your closet rod. This keeps belts organized and easy to grab.
    • Roll and Store: Roll each belt and store them in a shallow drawer or bin. This prevents creases and saves space.
    • Repurpose a Towel Rod: Mount a small towel rod on the closet wall and hang your belts from it using S-hooks.

    Quick Tip: Group belts by color or style (e.g., casual vs. formal) for quicker outfit coordination.

    blue red and black strap

    3. Scarves: Wrinkle-Free and Ready to Wear

    Scarves are versatile but can wrinkle or get lost in the shuffle. Here’s how to store them properly.

    • Scarf Hangers: Use a multi-ring scarf hanger to keep scarves organized and wrinkle-free. These hangers can hold multiple scarves without taking up much space.
    • Tension Rods: Install a small tension rod in your closet and drape scarves over it for easy access.
    • Drawer Dividers: Fold scarves neatly and store them in a drawer with dividers to keep them separated and visible.

    Style Tip: For silk or delicate scarves, consider rolling them to prevent creases.

    assorted-color cloth lot

    4. Multi-Purpose Storage: Think Outside the Box

    Sometimes, the best storage solutions are the ones that serve multiple purposes. Here are a few ideas:

    • Over-the-Door Organizers: These aren’t just for shoes! Use the pockets to store small accessories like clutches, sunglasses, or even rolled-up belts.
    • Hanging Baskets: Attach small baskets to the closet wall or door to hold grab-and-go items like hats or gloves.
    • Magnetic Strips: Mount a magnetic strip inside your closet door to hold metal accessories like bobby pins or hair clips.

    Space-Saver Alert: Use the inside of your closet door for extra storage—it’s often an overlooked space.

    brown wicker basket on white wall

    5. DIY Accessory Storage: Get Creative

    If you’re on a budget or love a good project, these DIY accessory storage ideas are both fun and functional.

    • Pegboard Perfection: Paint a pegboard to match your closet’s decor and use hooks to hang necklaces, scarves, or even small baskets for other accessories.
    • Repurposed Picture Frames: Remove the glass from an old picture frame and add small hooks or wire to create a chic jewelry display.
    • Mason Jar Magic: Use mason jars to store smaller items like hair ties, bracelets, or earrings. Attach them to a shelf or mount them on the wall for a rustic touch.

    DIY Tip: Search for tutorials on Pinterest for endless inspiration and step-by-step guides.

    Ball mason jar on table

    Bonus Tips for Small Closets

    If you’re working with limited space, these extra tips will help you maximize every inch:

    • Use Vertical Space: Install hooks or small shelves high up for items you don’t use daily.
    • Stackable Bins: Use clear, stackable bins to store seasonal accessories like winter scarves or summer hats.
    • Label Everything: Labels make it easy to find what you need without rummaging through bins or drawers.
    assorted clothes hanged on clothes hanger

    Conclusion

    Storing accessories doesn’t have to be a headache. With these 5 clever ways to store accessories in your closet, you can keep your jewelry, belts, and scarves organized, accessible, and damage-free. Whether you opt for a sleek organizer, a creative DIY project, or a combination of both, the key is to find a system that works for your space and style.

    Ready to transform your closet? Start with one or two of these accessory storage hacks and watch your closet become a more functional and stylish space. Have your own clever storage ideas? Share them in the comments below—we’d love to hear from you!

    Quick Recap of the Storage Solutions

    • Jewelry: Use organizers, drawer dividers, or wall-mounted hooks.
    • Belts: Try belt hooks, rolling, or a repurposed towel rod.
    • Scarves: Opt for scarf hangers, tension rods, or drawer dividers.
    • Multi-Purpose Storage: Use over-the-door organizers or magnetic strips.
    • DIY Ideas: Get creative with pegboards, picture frames, or mason jars.
  • The Ultimate Guide to Shoe Storage Solutions: From Racks to DIY Ideas

    The Ultimate Guide to Shoe Storage Solutions: From Racks to DIY Ideas

    Are you tired of tripping over shoes every time you walk through the door? Or maybe you can never find the pair you want when you’re rushing out in the morning? If your shoe collection is growing but your storage space isn’t, it’s time to get organized. Shoe storage solutions are the key to a clutter-free home and a stress-free routine. Whether you’re dealing with a small apartment or just need a better system for your entryway, this guide has you covered.

    In this ultimate guide to shoe storage, we’ll explore a variety of options—from sleek shoe racks to creative DIY ideas—that will help you organize your footwear in style. No matter your space or budget, there’s a solution here for you. Let’s dive in!

    Why Shoe Storage Matters

    Before we get into the specifics, let’s talk about why shoe organization is so important:

    • Saves Space: Proper storage keeps shoes off the floor and maximizes your available space.
    • Protects Your Shoes: Storing shoes correctly prevents scuffs, creases, and damage.
    • Saves Time: A well-organized system makes it easy to find the pair you need, when you need it.
    • Enhances Aesthetics: A tidy shoe collection can elevate the look of your entryway, closet, or bedroom.

    Now, let’s explore the best shoe storage solutions for every need and space.

    photography of assorted-color shoes lot on box

    1. Shoe Racks: The Classic Choice

    Shoe racks are a go-to solution for a reason—they’re versatile, affordable, and come in a variety of styles. Here are some popular types:

    • Over-the-Door Racks: Perfect for small spaces, these racks hang over the back of a door and can hold multiple pairs without taking up floor space.
    • Freestanding Racks: Available in materials like wood, metal, or plastic, these racks can be placed in closets, entryways, or even bedrooms.
    • Adjustable Racks: These allow you to customize the height and width, making them ideal for boots or larger shoes.

    Pros: Easy to install, affordable, and great for small spaces.
    Cons: May not hold very large collections or bulky shoes like boots.

    Quick Tip: Look for racks with tiers to maximize vertical space.

    black and brown leather boots on brown wooden floor

    2. Shoe Shelves: Customizable and Stylish

    If you’re looking for a more permanent solution, shoe shelves offer both functionality and style.

    • Built-In Shelves: If you have a closet with extra space, consider adding built-in shelves for a seamless look.
    • Floating Shelves: These can be mounted on walls and used to display your favorite pairs while keeping them organized.
    • Modular Shelving Units: Perfect for renters, these units can be adjusted or moved as needed.

    Pros: Can be tailored to your space, great for displaying stylish shoes.
    Cons: May require more installation effort.

    Style Tip: Use floating shelves in your entryway to create a chic, minimalist look.

    unpaired black and white leather combat boot

    3. Shoe Boxes and Bins: Neat and Tidy

    For those who prefer a concealed storage option, shoe boxes and bins are a great choice.

    • Clear Plastic Boxes: These allow you to see your shoes easily while keeping them dust-free.
    • Fabric Bins: Ideal for a softer, more decorative look, especially in bedrooms or closets.
    • Labeled Bins: Use labels to quickly identify which shoes are inside, especially for seasonal storage.

    Pros: Protects shoes from dust and damage, stackable for easy storage.
    Cons: Can take up more space if not stacked efficiently.

    Space-Saver Alert: Stack boxes under your bed or on high closet shelves to free up floor space.

    green stool

    4. Under-Bed Storage: Hidden and Convenient

    Don’t overlook the space under your bed—it’s prime real estate for shoe storage.

    • Under-Bed Storage Bags: These zippered bags can hold multiple pairs and slide easily under the bed.
    • Rolling Storage Boxes: For easy access, choose boxes with wheels that you can pull out when needed.

    Pros: Maximizes unused space, great for seasonal shoes.
    Cons: May not be ideal for everyday shoes you need quick access to.

    Quick Tip: Use under-bed storage for off-season shoes, like winter boots in summer.

    tufted white upholstered bed

    5. DIY Shoe Storage Ideas: Get Creative

    If you’re on a budget or just love a good project, DIY shoe storage can be both fun and functional.

    • Repurposed Crates: Stack old wooden crates to create a rustic shoe shelf.
    • PVC Pipe Storage: Cut PVC pipes into sections and glue them together for a modern, honeycomb-like shoe organizer.
    • Pallet Shoe Rack: Use a reclaimed pallet to create a vertical shoe rack for your entryway.

    Pros: Customizable, budget-friendly, and unique.
    Cons: Requires time and effort to create.

    DIY Tip: Search for tutorials on Pinterest or YouTube for step-by-step instructions.

    screws, dowels, hammer, mother, to build, washers, diy, dowels, hammer, diy, diy, diy, diy, diy

    6. Tips for Organizing Shoes Like a Pro

    No matter which storage solution you choose, these shoe organization tips will help you maintain a tidy system:

    • Sort by Type: Group shoes by category (e.g., sneakers, heels, boots) for easy access.
    • Frequency of Use: Keep everyday shoes at eye level or in the most accessible spot.
    • Seasonal Rotation: Store off-season shoes in less accessible areas, like under the bed or in bins.
    • Use Hooks or Pegs: Hang boots or sandals on hooks to save shelf space.

    Pro Tip: Add a small bench or ottoman near your shoe storage for a convenient spot to put on or take off shoes.

    pairs of assorted sandal lot on white textile

    Choosing the Right Solution for Your Space

    Not sure which shoe storage solution is best for you? Consider these factors:

    • Space Available: Measure your space to determine whether a rack, shelf, or under-bed storage is feasible.
    • Number of Shoes: Larger collections may require modular shelving or multiple racks.
    • Accessibility Needs: If you need daily access, opt for open racks or shelves rather than boxes.
    • Aesthetic Preferences: Choose materials and styles that match your home’s decor.

    Quick Checklist:

    • Measure your space.
    • Count your shoes.
    • Decide on open vs. concealed storage.
    • Consider your budget.
    pair of shoes and white box near plant

    Conclusion

    Organizing your shoes doesn’t have to be a daunting task. With the right shoe storage solutions, you can transform your space, protect your footwear, and make your daily routine smoother. Whether you opt for a sleek shoe rack, a creative DIY project, or a combination of storage methods, the key is to find what works best for your space and lifestyle.

    Ready to get started? Pick one or two ideas from this guide and take the first step toward a clutter-free home. Your shoes—and your sanity—will thank you!

    Nike shoe lot

    Quick Recap of Shoe Storage Solutions

    • Shoe Racks: Versatile and space-saving.
    • Shoe Shelves: Customizable and stylish.
    • Shoe Boxes and Bins: Neat and protective.
    • Under-Bed Storage: Hidden and convenient.
    • DIY Shoe Storage: Creative and budget-friendly.
  • How to Organize Your Wardrobe by Season: Tips for Rotating Clothes and Storing Off-Season Stuff

    How to Organize Your Wardrobe by Season: Tips for Rotating Clothes and Storing Off-Season Stuff

    Ever feel like your closet is bursting at the seams, yet you can never find anything to wear? You’re not alone. Seasonal wardrobe organization is the key to a clutter-free closet and a stress-free morning routine. By rotating your clothes and storing off-season items properly, you can save space, make it easier to find what you need, and even prolong the life of your favorite garments.

    In this guide, we’ll walk you through a simple, step-by-step process to organize your wardrobe by season. Whether you’re dealing with a tiny closet or just need a better system, these closet organization tips will help you create a functional and stylish space. Let’s get started!

    Why Seasonal Wardrobe Organization Matters

    Before we dive into the how-to, let’s talk about why organizing your wardrobe by season is worth the effort:

    • Saves Space: Storing off-season clothes frees up valuable closet real estate.
    • Makes Mornings Easier: With only relevant clothes in sight, you’ll spend less time deciding what to wear.
    • Protects Your Clothes: Proper storage prevents damage from dust, pests, or moisture.
    • Reduces Clutter: A seasonal system helps you declutter regularly, keeping your closet manageable.

    Now, let’s get to the good stuff—how to actually do it.

    a pile of clothes sitting on top of a white floor

    Step 1: Declutter Your Closet

    The first step to any organization project is decluttering. It’s tough, but it’s essential. Here’s how to do it without feeling overwhelmed:

    • Ask Yourself Key Questions: For each item, ask, “Have I worn this in the past year?” and “Does this still fit my style?” If the answer is no, it’s time to let it go.
    • Sort into Piles: Create three piles—keep, donate, and toss. Be honest with yourself about what you actually wear.
    • Don’t Forget Accessories: Shoes, bags, and jewelry can also be decluttered. If they’re worn out or no longer your style, it’s time to say goodbye.

    Pro Tip: If you’re struggling to part with something, try the “hanger trick.” Turn all your hangers backward, and only turn them forward when you wear the item. After six months, donate anything still facing backward.

    assorted-color apparels

    Step 2: Sort Your Clothes by Season

    Once you’ve decluttered, it’s time to sort your clothes by season. This makes it easier to rotate your wardrobe and store off-season items.

    • Spring/Summer: Lightweight fabrics, short sleeves, sandals, and swimwear.
    • Fall/Winter: Heavy coats, sweaters, boots, and layering pieces.
    • Year-Round Staples: Items like jeans, basic tees, or versatile dresses that work in any season.

    Quick Tip: If you live in a climate with less distinct seasons, you can still group clothes by “warm” and “cool” weather.

    hanged top on brown and white clothes horse

    Step 3: Store Off-Season Clothes Properly

    Storing off-season clothes the right way keeps them fresh and damage-free. Here’s how to do it:

    • Vacuum-Sealed Bags: These are perfect for bulky items like coats or sweaters. They save space and protect against dust and pests.
    • Storage Bins: Use clear, labeled bins for easy access. Store them under the bed, on high shelves, or in a spare closet.
    • Garment Bags: For delicate items like dresses or suits, use breathable garment bags to prevent wrinkles and damage.

    Space-Saver Alert: If you’re short on storage, consider using the back of your closet door or investing in a rolling under-bed storage container.

    clothes in closet

    Step 4: Organize Your Current Season Clothes

    Now that your off-season clothes are stored, it’s time to organize your current season wardrobe for easy access.

    • By Type: Group clothes by category—shirts, pants, dresses, etc. This makes it simple to find what you need.
    • By Color: For a visually appealing closet, arrange each category by color. It’s not just pretty—it also helps you spot items faster.
    • Use Shelf Dividers: If you have shelves, use dividers to keep stacks of clothes neat and prevent them from toppling over.

    Style Tip: Hang your most-worn items at eye level for quick access, and store less-used pieces higher up or in drawers.

    view of walk-in closet

    Step 5: Maintain Your Seasonal System

    Organization isn’t a one-time event—it’s an ongoing process. Here’s how to keep your seasonal wardrobe system running smoothly:

    • Set Reminders: Schedule a wardrobe rotation every 3-4 months to align with the changing seasons.
    • Declutter Regularly: Each time you rotate, take a few minutes to declutter again. It’s easier to maintain than starting from scratch.
    • Invest in Quality Hangers: Slim, non-slip hangers save space and keep clothes from sliding off.

    Bonus: Use scented sachets or cedar blocks in your storage bins to keep clothes smelling fresh and deter pests.

    white textile on brown leather bag

    Bonus Tips for Small Closets

    If you’re working with a small closet, these extra tips will help you maximize every inch:

    • Use Vertical Space: Install shelves or hooks above your hanging rod for extra storage.
    • Double Up Hangers: Use cascading hangers or clips to hang multiple items vertically.
    • Store Shoes Creatively: Over-the-door shoe organizers aren’t just for shoes—use them for accessories, scarves, or even cleaning supplies.
    clothes hanged on brown wooden cabinet

    Conclusion

    Organizing your wardrobe by season doesn’t have to be a daunting task. With these simple tips for rotating clothes and storing off-season items, you’ll create a closet that’s functional, clutter-free, and easy to maintain. Start with a declutter, sort your clothes by season, store off-season items properly, and organize your current wardrobe for quick access. Don’t forget to maintain your system with regular check-ins.

    Ready to transform your closet? Try these steps today and enjoy a more organized, stress-free wardrobe. Have your own closet organization tips? Share them in the comments below—we’d love to hear from you!

    Quick Recap of the Steps

    • Declutter your closet.
    • Sort your clothes by season.
    • Store off-season clothes properly.
    • Organize your current season clothes.
    • Maintain your system with regular rotations.

  • Top 10 Time Management Tips for Working from Home

    Top 10 Time Management Tips for Working from Home

    Working from home offers flexibility and freedom, but it also comes with unique challenges—especially when it comes to managing your time. Without the structure of an office environment, it’s easy to get distracted by household chores, family members, or even the temptation to binge-watch your favorite show. Poor time management can lead to missed deadlines, stress, and burnout. But don’t worry! With the right strategies, you can stay productive, focused, and balanced while working remotely.

    In this post, we’ll share 10 practical time management tips for working from home that will help you make the most of your day. Whether you’re new to remote work or a seasoned pro, these tips will boost your productivity and keep distractions at bay. Let’s dive in!


    1. Set a Clear Daily Schedule

    Start your day with a plan. Create a schedule that outlines your work hours, breaks, and key tasks. Stick to it as closely as possible to maintain structure.

    • Use a planner or digital calendar to block out time for focused work, meetings, and even personal activities.
    • Set specific start and end times to avoid overworking or procrastinating.

    Pro Tip: Review your schedule the night before to mentally prepare for the next day.


    2. Prioritize Your Tasks

    Not all tasks are created equal. Focus on high-impact activities that move the needle.

    • Use the Eisenhower Matrix to categorize tasks by urgency and importance.
    • Tackle your most important task (MIT) first thing in the morning when your energy is highest.

    This ensures you’re making progress on what truly matters, even if the day gets hectic.


    3. Create a Dedicated Workspace

    Your environment affects your productivity. Set up a designated workspace that’s free from distractions.

    • Choose a quiet area away from high-traffic zones like the kitchen or living room.
    • Keep your desk clutter-free to maintain focus.

    A dedicated space signals to your brain that it’s time to work, helping you stay on task.


    4. Use the Pomodoro Technique

    Working in short, focused bursts can boost productivity. Try the Pomodoro Technique:

    • Work for 25 minutes, then take a 5-minute break.
    • After four cycles, take a longer break (15-30 minutes).

    This method prevents burnout and keeps your mind fresh throughout the day.


    5. Limit Multitasking

    Juggling multiple tasks at once can actually slow you down. Focus on one task at a time to work more efficiently.

    • Batch similar tasks (like answering emails or making calls) to streamline your workflow.
    • Use tools like Trello or Asana to organize tasks and avoid switching between unrelated activities.

    Single-tasking helps you complete work faster and with fewer mistakes.


    6. Set Boundaries with Family or Roommates

    Distractions from others can derail your productivity. Communicate your work hours clearly to those around you.

    • Use a “do not disturb” sign or headphones to signal when you’re in focus mode.
    • Schedule breaks to check in with family or handle household tasks.

    Setting boundaries ensures you have uninterrupted time to focus on work.


    7. Take Regular Breaks

    Breaks aren’t a luxury—they’re essential for maintaining productivity. Step away from your desk periodically to recharge.

    • Follow the 52-17 rule: Work for 52 minutes, then break for 17.
    • Use breaks to stretch, walk, or grab a healthy snack.

    Regular breaks prevent fatigue and help you stay sharp throughout the day.


    8. Leverage Technology Wisely

    The right tools can save you time and keep you organized. Use productivity apps to streamline your workday.

    • Time-tracking apps like Toggl to monitor how you spend your time.
    • Automation tools like Zapier to handle repetitive tasks.

    But be mindful—too many apps can become a distraction. Stick to a few essentials.


    9. Dress for Success

    Pajamas might be comfy, but they can blur the line between work and relaxation. Dress as if you’re going to the office to boost your mindset.

    • Wear something professional (even if it’s just from the waist up for video calls).
    • Establish a morning routine that includes getting dressed to signal the start of your workday.

    This simple habit can shift your mindset and increase focus.


    10. Reflect and Adjust Weekly

    Time management is an ongoing process. Set aside time each week to review what worked and what didn’t.

    • Track your productivity to identify patterns or distractions.
    • Adjust your schedule or strategies based on what you learn.

    Regular reflection helps you fine-tune your approach and stay on top of your goals.


    Conclusion

    Mastering time management while working from home isn’t about working harder—it’s about working smarter. By implementing these 10 practical time management tips, you’ll be able to stay focused, avoid distractions, and maintain a healthy work-life balance. Start with one or two tips that resonate with you, and gradually build them into your routine. Consistency is key!

    Ready to take control of your workday? Try these strategies today and watch your productivity soar. And don’t forget to share your favorite tips with fellow remote workers—drop a comment below or share this post on social media!


    Quick Recap of the Tips

    • Set a clear daily schedule.
    • Prioritize your tasks.
    • Create a dedicated workspace.
    • Use the Pomodoro Technique.
    • Limit multitasking.
    • Set boundaries with family or roommates.
    • Take regular breaks.
    • Leverage technology wisely.
    • Dress for success.
    • Reflect and adjust weekly.
  • 10 Genius Closet Hacks for Small Spaces: Quick Storage Ideas for Small Closets

    10 Genius Closet Hacks for Small Spaces: Quick Storage Ideas for Small Closets

    Are you tired of battling a cluttered closet every morning? Small closets can feel like a constant struggle, especially when you’re short on space but long on stuff. Whether you’re living in a cozy apartment or just dealing with a less-than-ideal closet setup, the good news is that you don’t need a massive walk-in to stay organized. With a few clever hacks, you can transform even the tiniest closet into a functional, clutter-free zone.

    In this post, we’ll share 10 genius closet hacks for small spaces that are easy to implement, budget-friendly, and perfect for maximizing every inch. From vertical storage tricks to space-saving hangers, these quick storage ideas will help you make the most of your small closet. Let’s dive in!


    1. Use Vertical Space Like a Pro

    When floor space is limited, it’s time to think upward. Vertical storage is your best friend in a small closet.

    • Install shelves: Add floating shelves above your hanging rod to store folded clothes, shoes, or bins.
    • Hooks are heroes: Use adhesive hooks on the walls or inside doors for bags, scarves, or hats.
    • Stackable bins: Opt for clear, stackable bins to keep smaller items tidy and visible.

    Pro Tip: Label your bins for easy access—no more digging through mystery boxes!


    2. Double Your Hanging Space

    Why settle for one hanging rod when you can have two?

    • Install a second rod: Add a lower rod for shorter items like shirts or skirts, instantly doubling your hanging capacity.
    • Adjustable rods: Use an adjustable tension rod for a no-tools-needed solution that’s renter-friendly.

    This hack is a game-changer for small closets, giving you twice the space without taking up extra room.


    3. Shoe Organizers Aren’t Just for Shoes

    Over-the-door shoe organizers are a small closet’s secret weapon.

    • Store accessories: Use the pockets for jewelry, belts, or even small handbags.
    • Organize cleaning supplies: If your closet doubles as storage, keep small cleaning items tidy.
    • Kids’ closets: Perfect for stashing toys, socks, or craft supplies.

    Quick Idea: Choose a clear-pocket organizer so you can see everything at a glance.


    4. Baskets and Bins: Your Organizational MVPs

    Clutter thrives in unassigned spaces. Baskets and bins bring order to the chaos.

    • Shelf storage: Place baskets on shelves to hold folded clothes, seasonal items, or accessories.
    • Label everything: Use chalkboard labels or tags for a chic, functional touch.
    • Under-shelf baskets: Maximize space by adding baskets that slide onto existing shelves.

    These not only keep things tidy but also make it easy to grab what you need in a hurry.


    5. Switch to Slim Hangers

    Bulky hangers are eating up your precious space.

    • Slim velvet hangers: These take up less room and keep clothes from slipping.
    • Cascading hangers: Use hangers with clips to hang multiple items vertically (great for pants or scarves).

    Space-Saver Alert: Slim hangers can free up to 50% more space compared to traditional ones.


    6. Rotate Seasonal Items

    Don’t let off-season clothes hog your closet year-round.

    • Vacuum-sealed bags: Store winter coats or summer dresses in sealed bags to save space.
    • Under-bed storage: Slide out-of-season items under the bed or in another closet.

    This hack keeps your small closet focused on what you actually need right now.


    7. Drawer Dividers for the Win

    If your closet has drawers, make them work harder.

    • Use dividers: Keep socks, underwear, or accessories neatly separated.
    • DIY option: Cut cardboard or use small boxes as makeshift dividers.

    Bonus: This works for shelves too—use dividers to keep stacks of clothes from toppling over.


    8. Light It Up

    A dark closet makes it hard to find anything, especially in a small space.

    • Battery-operated lights: Stick these on walls or shelves for instant illumination.
    • Motion-sensor lights: These turn on when you open the door—perfect for hands-free convenience.

    Good lighting not only helps you stay organized but also makes your closet feel more spacious.


    9. Mirror, Mirror on the Door

    A mirror is a small closet’s best friend.

    • Inside the door: Mount a full-length mirror on the inside of your closet door.
    • Dual purpose: It saves wall space and gives you a quick outfit check before heading out.

    Style Tip: Choose a slim, frameless mirror for a sleek look that won’t crowd your closet.


    10. Color Code for Quick Access

    Organizing by color isn’t just for aesthetics—it’s practical too.

    • Group by color: Hang clothes in rainbow order or group similar shades together.
    • Find things faster: No more hunting for that one black top in a sea of clothes.

    This hack adds a visual appeal to your closet while making it easier to grab what you need.


    Conclusion

    Small closets don’t have to mean big headaches. With these 10 genius closet hacks for small spaces, you can turn even the tiniest closet into an organized, functional part of your home. From doubling your hanging space to getting creative with vertical storage, these quick storage ideas are designed to help you make the most of every inch.

    Ready to transform your closet? Start with one or two hacks that speak to you, and watch the magic happen. And don’t forget—organization is a journey, not a destination. Happy organizing!


    Quick Recap of the Hacks

    • Use vertical space with shelves and hooks.
    • Double your hanging space with a second rod.
    • Repurpose shoe organizers for accessories.
    • Keep things tidy with labeled baskets and bins.
    • Switch to slim hangers for extra room.
    • Rotate seasonal items to free up space.
    • Use drawer dividers for neat storage.
    • Add lighting for better visibility.
    • Install a mirror inside the door.
    • Color code your clothes for easy access.